The Releaser Tool
Note
This documentation page is aimed at developers who want to customize, change or extend the code of OpenWISP Utils in order to modify its behavior (e.g.: for personal or commercial purposes or to fix a bug, implement a new feature or contribute to the project in general).
If you aren't a developer and you are looking for information on how to use OpenWISP, please refer to:
This interactive command-line tool streamlines the entire project release workflow, from generating a change log to creating a draft release on GitHub. It is designed to be resilient, allowing you to recover from common failures like network errors without starting over.
Prerequisites
1. Installation
Install the releaser and all its Python dependencies from the root of the
openwisp-utils repository:
pip install .[releaser]
2. GitHub Personal Access Token
The tool requires a GitHub Fine-grained Personal Access Token to create pull requests, tags, and releases on your behalf.
Navigate to Settings > Developer settings > Personal access tokens > Fine-grained tokens.
Click Generate new token.
Give it a descriptive name (e.g., "OpenWISP Releaser") and set an expiration date.
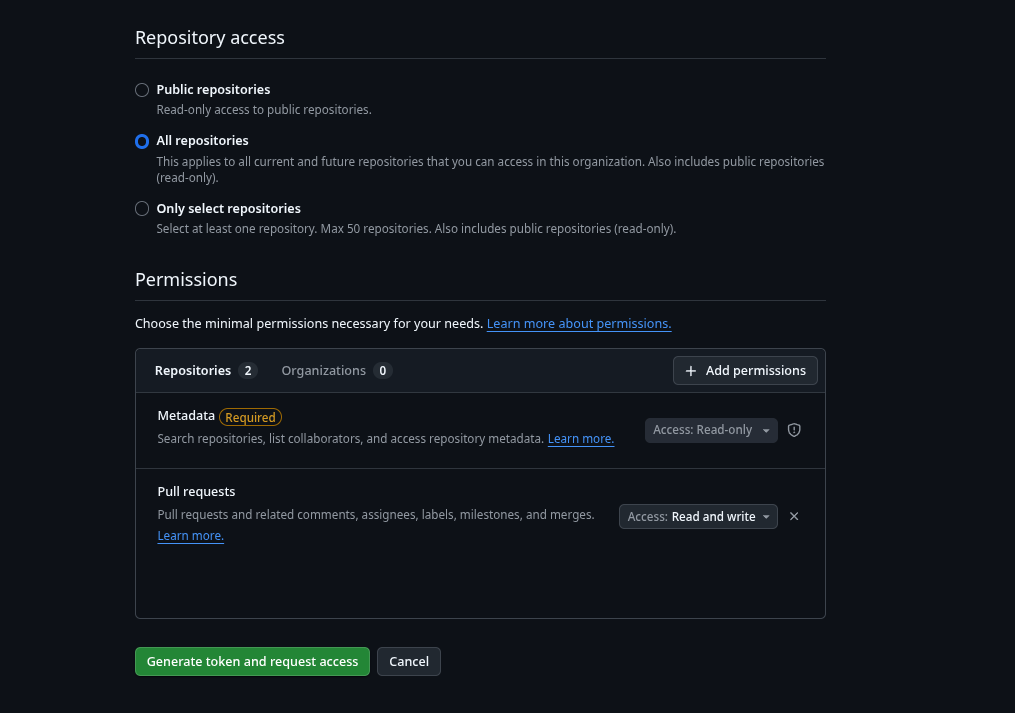
Under Repository access, choose either All repositories or select the specific repositories you want to manage.
Under Permissions, click on Add permissions.
Grant the following permissions:
Metadata: Read-only
Pull requests: Read & write
Generate the token and export it as an environment variable:
export OW_GITHUB_TOKEN="github_pat_YourTokenGoesHere"
Usage
Navigate to the root directory of the project you want to release and run the following command:
python -m openwisp_utils.releaser
The Interactive Workflow
The tool will guide you through each step. Here are the key interactions:
1. Version Confirmation The tool will detect the current version and suggest the next one. You can either accept the suggestion or enter a different version manually.
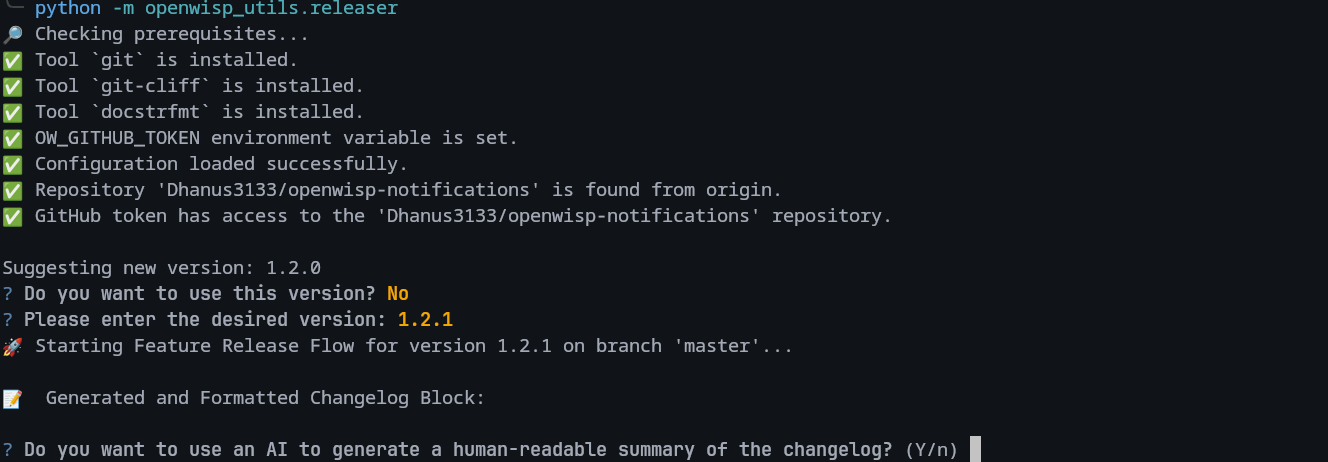
2. Change Log Generation & Review A changelog is generated from your recent commits. You will be shown the final changelog block and asked to accept it before the files are modified.
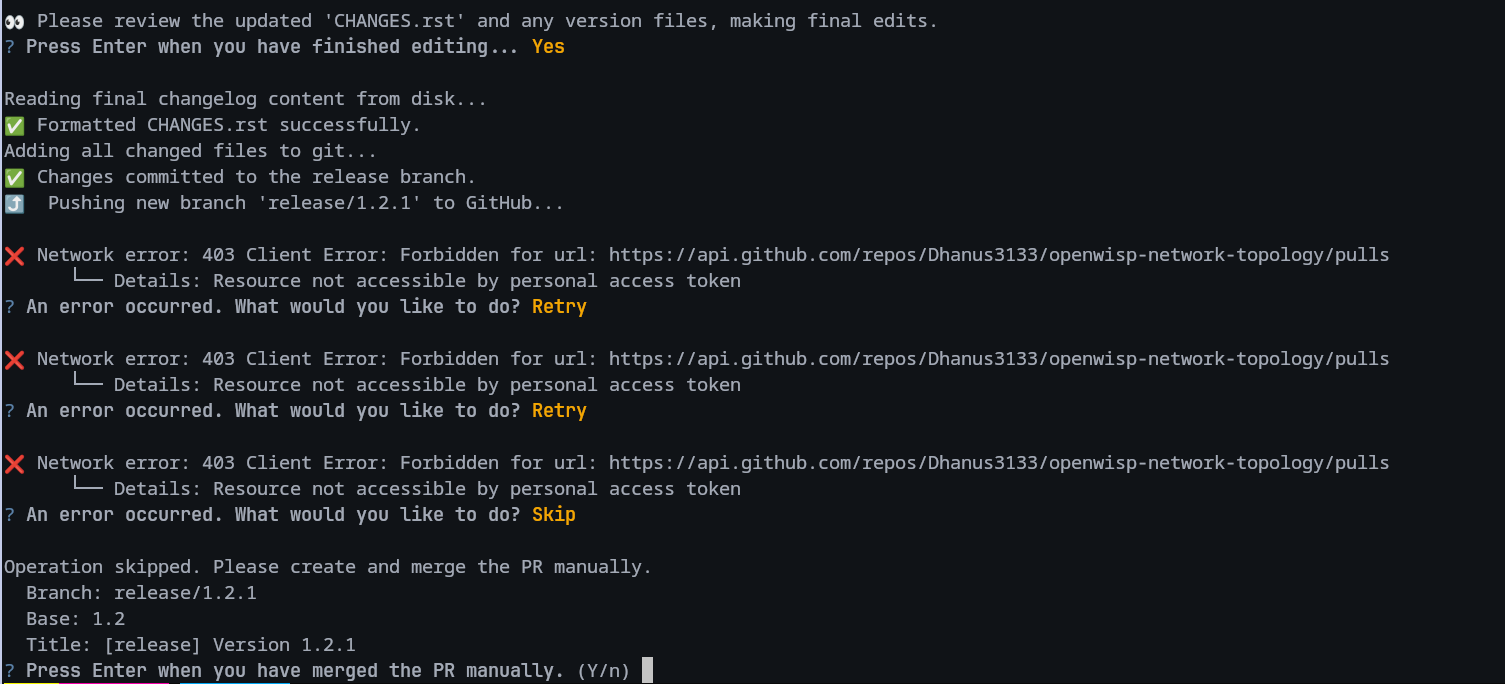
3. Resilient Error Handling If any network operation fails (e.g., creating a pull request), the tool won't crash. Instead, it will prompt you to Retry, Skip the step (with manual instructions), or Abort.
Summary of Automated Steps
Once you confirm the change log, the tool automates the rest of the process:
Updates the version number in your project's
__init__.py.Writes the new release notes to your
CHANGES.rstorCHANGES.mdfile.Creates a
release/<version>branch and commits the changes.Pushes the new branch to GitHub.
Creates a pull request and waits for you to merge it.
Once merged, it creates and pushes a signed git tag.
Finally, it creates a draft release on GitHub with the changelog notes.
If releasing a bugfix, it offers to port the changelog to the
mainormasterbranch.