OpenWISP Demo
Accessing the demo system
URL: demo.openwisp.io
Username: demo
Password: tester123
The content of the demo organization is reset every day at 1:00 AM UTC, and the demo user's password is reset every minute.
To ensure the safety and integrity of our managed OpenWISP system, certain features are disabled for the demo user, including:
Deleting existing devices
Sending custom shell commands to devices
Sending password change commands to devices
Uploading new firmware builds
Launching firmware upgrade operations
Creating new users or modifying the details of the demo organization
Changing the details of RADIUS groups
If you would like to test any of these features, we offer a free 30-day trial period. You can access the request form for the free trial by using the demo system, or by contacting our support.
Firmware instructions (flashing OpenWISP Firmware)
We offer an OpenWrt-based firmware that includes all the packages typically used in OpenWISP installations.
This firmware can help you quickly get started and test the core features of OpenWISP Cloud.
If you prefer to use your existing firmware, please refer to the the alternative firmware instructions.
1. Downloading the firmware
To download the OpenWISP firmware for your device, visit downloads.openwisp.io and select the appropriate target architecture and image.
At present, we are generating firmware only for ath79, but we plan to
add support for more targets in the future.
If your device is not currently supported, please let us know through our support channels and/or follow our alternative firmware instructions below.
2. Flashing the firmware
You can Flash the firmware via web UI, or via other means available on OpenWrt.
Make sure not to keep settings: supply the -n command line option to sysupgrade. If you're using the OpenWrt web UI, there is a specific checkbox labeled "Keep settings and retain the current configuration" which appears just before confirming the upgrade and needs to be unchecked.
Alternative firmware instructions
If your device is missing from our list of available firmware images or if you have a custom firmware you do not want to lose, you can get the basic features working by downloading and installing the following packages on your device:
openvpn (management tunnel, needed for active checks and push operations)
openwisp-config
openwisp-monitoring (and its dependency netjson-monitoring)
The easiest thing is to use the following commands:
opkg update
# install OpenVPN
opkg install openvpn-wolfssl
# install OpenWISP agents
opkg install openwisp-config
opkg install openwisp-monitoring
If you want to install more recent versions of the OpenWISP packages, you can download them onto your device from downloads.openwisp.io and then install them, e.g.:
opkg update
# install OpenVPN anyway
opkg install openvpn-wolfssl
cd /tmp

# WARNING: the URL may change overtime, so verify the right URL
# from downloads.openwisp.io

wget https://downloads.openwisp.io/openwisp-config/latest/openwisp-config_1.1.0-1_all.ipk
wget https://downloads.openwisp.io/openwisp-monitoring/latest/netjson-monitoring_0.2.1-1_all.ipk
wget https://downloads.openwisp.io/openwisp-monitoring/latest/openwisp-monitoring_0.2.1-1_all.ipk
opkg install ./openwisp-config_1.1.0-1_all.ipk
opkg install ./netjson-monitoring_0.2.1-1_all.ipk
opkg install ./openwisp-monitoring_0.2.1-1_all.ipk
Note
If wget doesn't work (e.g.: SSL issues), you can use curl, or
alternatively you can download the packages onto your machine and from
there upload them to your device via scp.
Once the packages are installed, copy the following contents to
/etc/config/openwisp:
config controller 'http'
    option url 'https://cloud.openwisp.io'
    # the following shared secret is for the demo organization
    option shared_secret 'nzXTd7qpXKPNdrWZDsYoMxbGpOrEVjeD'
    option management_interface 'tun0'
Once the configuration has been changed, you will need to restart the agent:
service openwisp_config restart
Connecting your device to OpenWISP
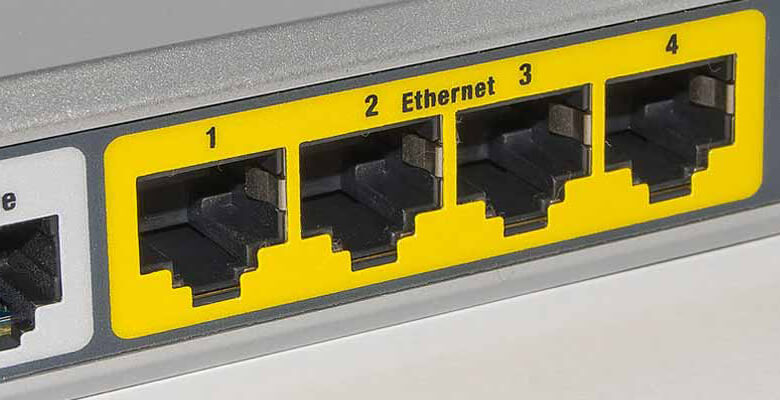
Once your device is flashed, connect an Ethernet cable from your LAN into one of the LAN ports.
DHCP client mode
Assuming your LAN is equipped with a DHCP server (usually your main ISP router), after booting up, the device will be assigned an IP address from the LAN DHCP server. At this point, the device should be able to reach the internet and register to the OpenWISP demo system.
Static address mode
If your LAN does not have a DHCP server, you will need to configure a static IP address and gateway address for the LAN interface.
Registration
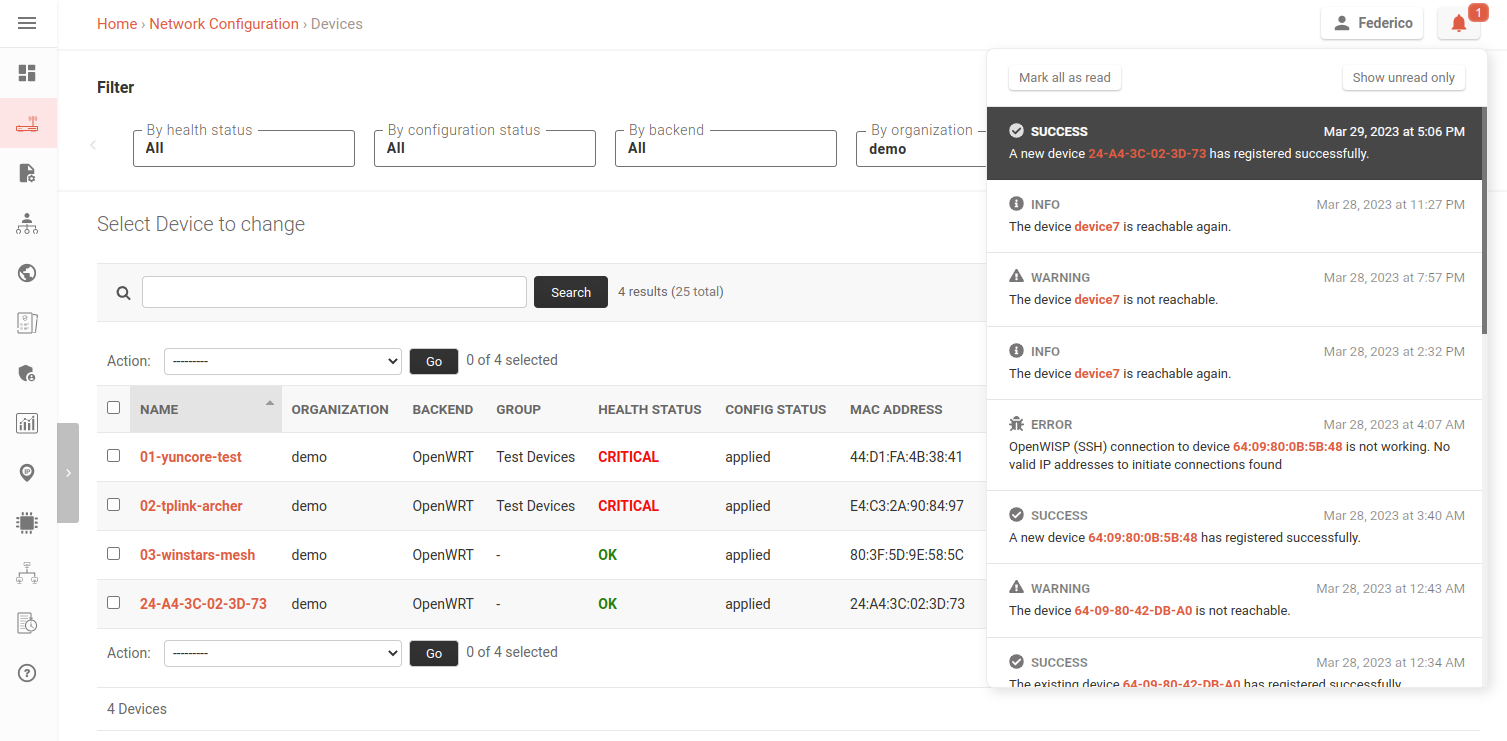
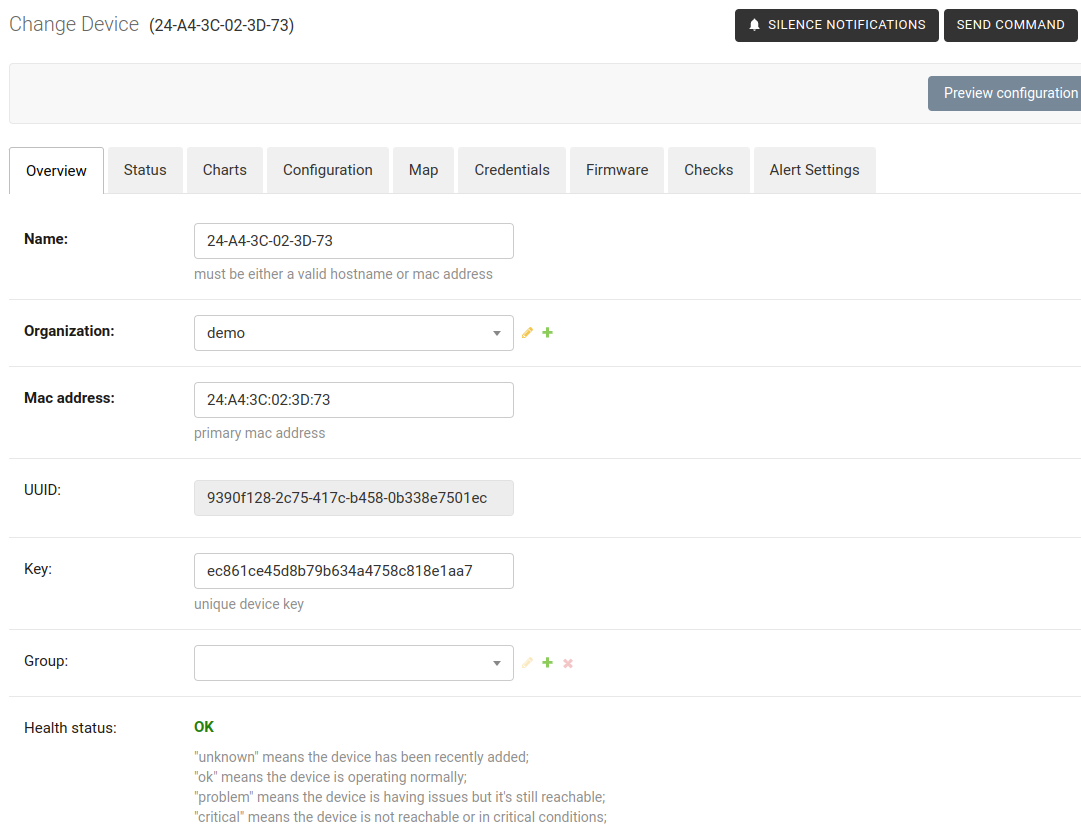
If the above steps have been completed correctly, and the device is connected to the internet, then it will automatically register and appear in the list of available devices for the demo organization. You will then be able to locate the device by its MAC address, as shown in the screenshot above, or by its name if you have changed it from "OpenWrt" to something else.
At this point, the device should have already downloaded and applied the configuration. After a few minutes the management tunnel will be set up and the device will start collecting monitoring information.
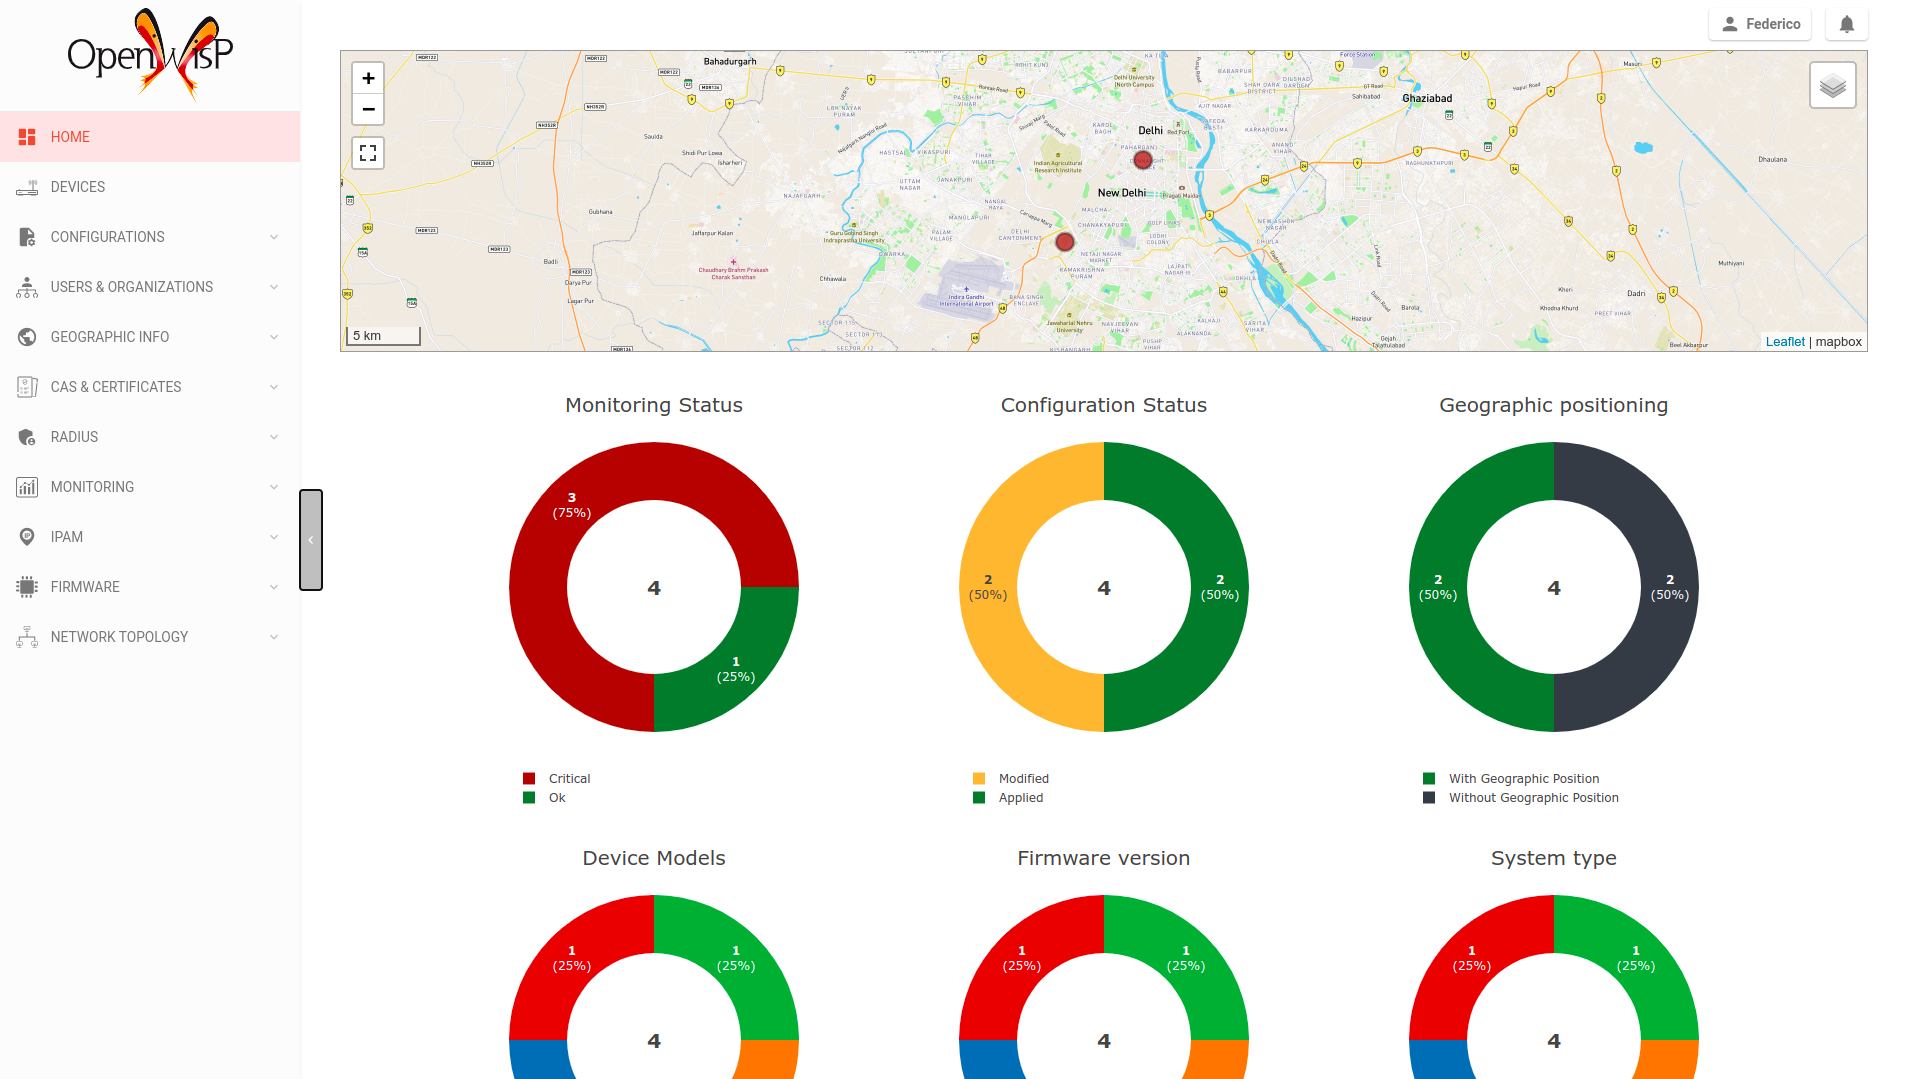
Monitoring charts and status
Once the OpenWISP Monitoring package has been installed and launched, it will start collecting metrics from your device. You will be able to see this information displayed in the UI, which will be similar to the screenshots shown below.
Health status
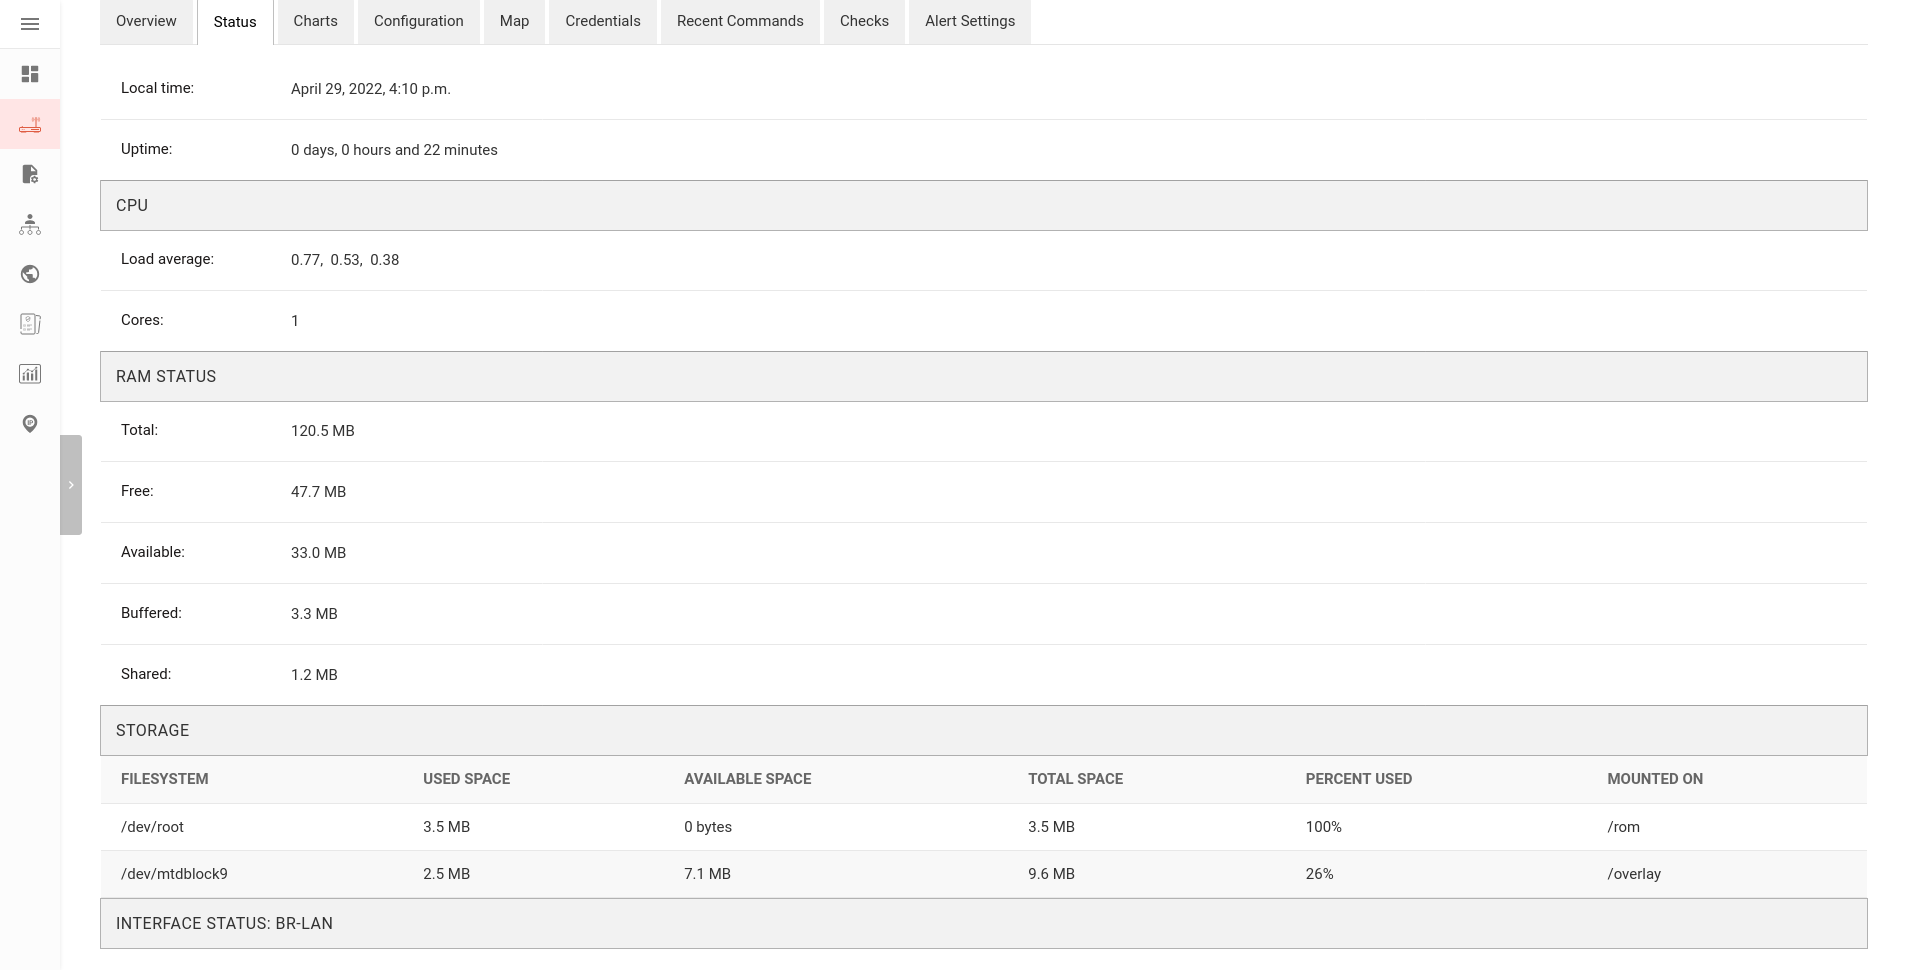
Device Status


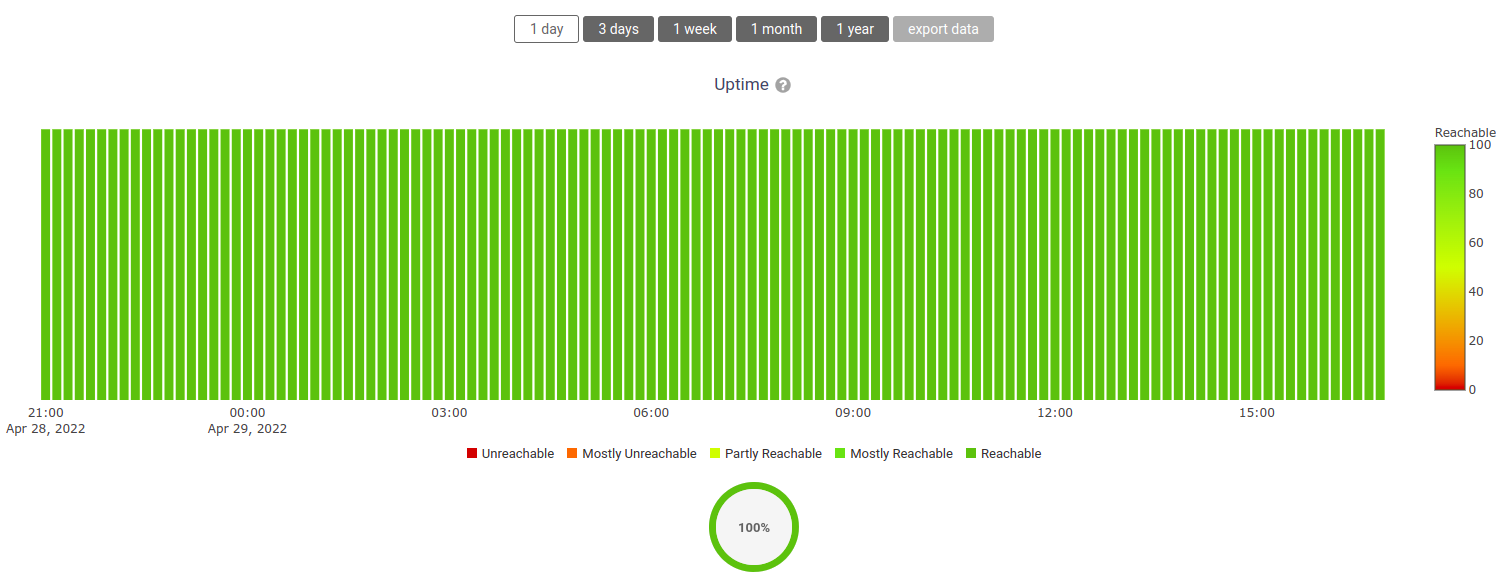
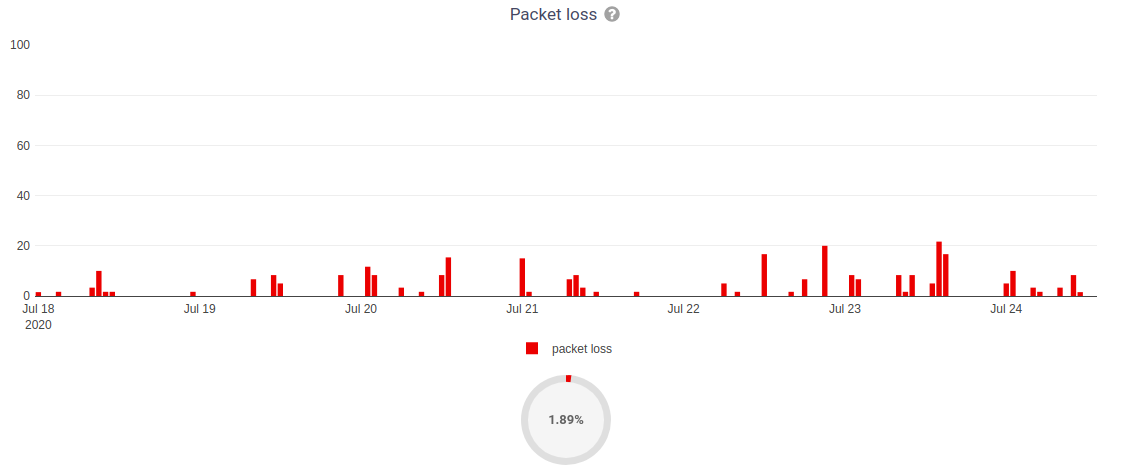
Charts
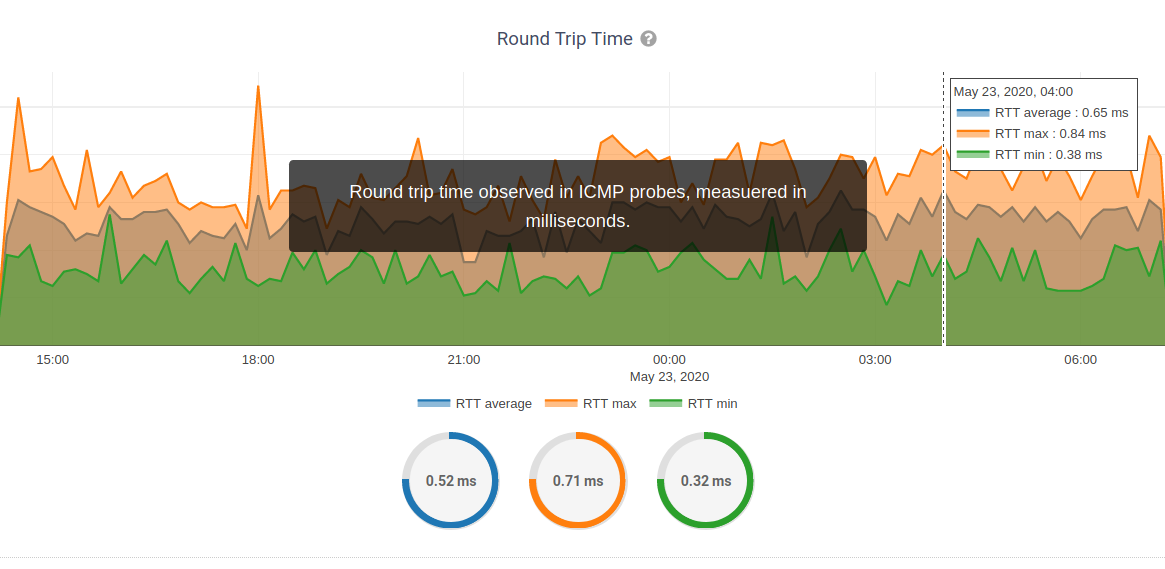
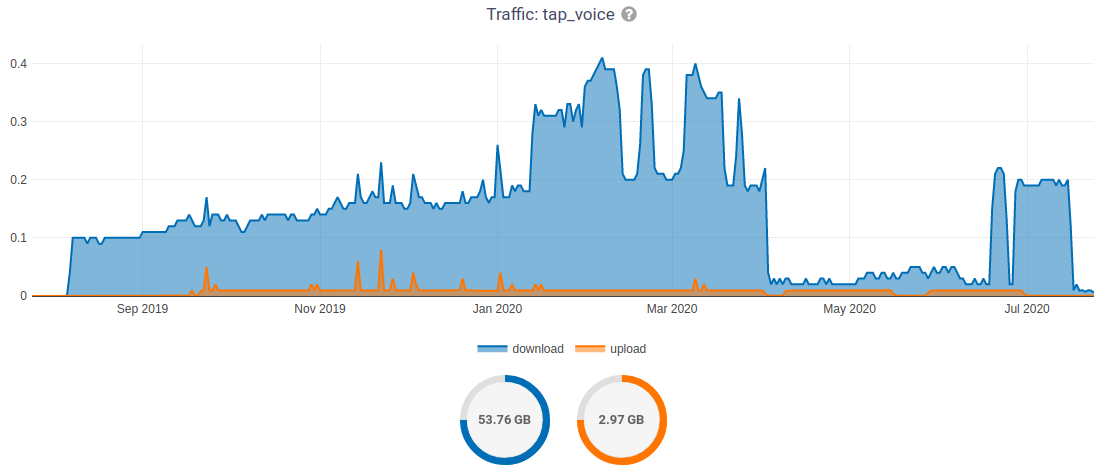
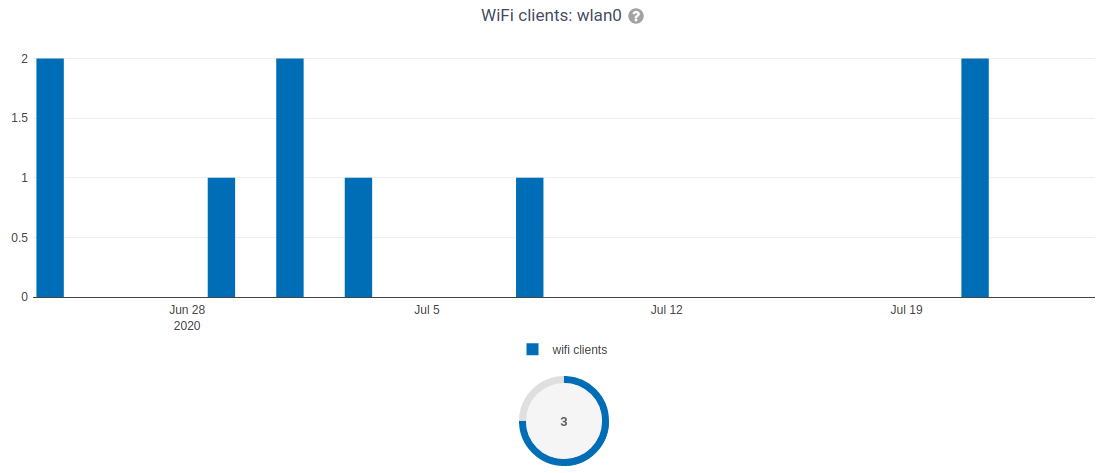
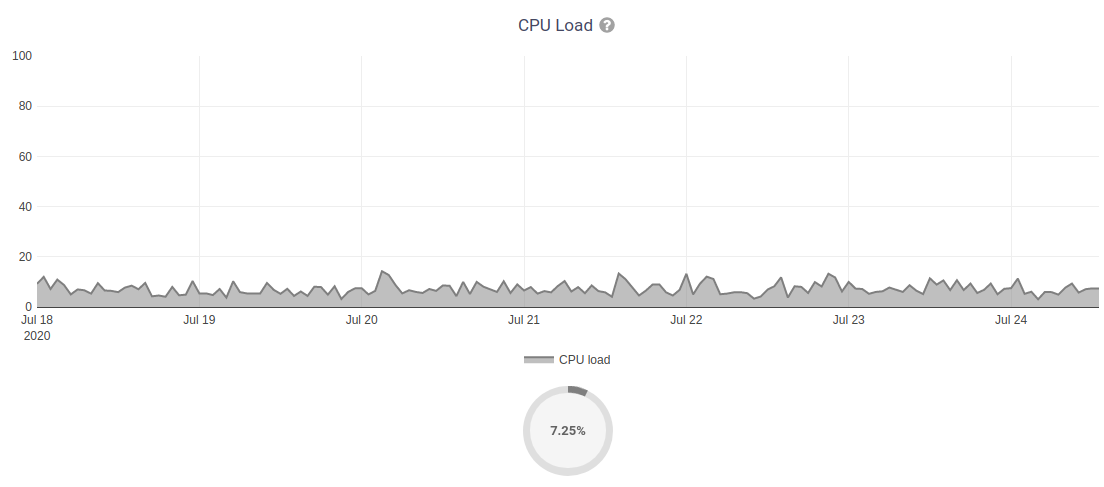
The following charts are displayed only for devices with mobile connections (e.g.: 3G, LTE).
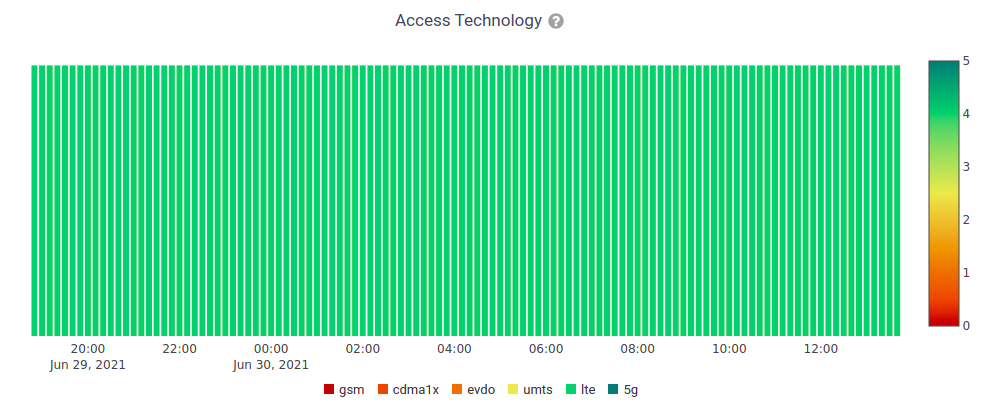
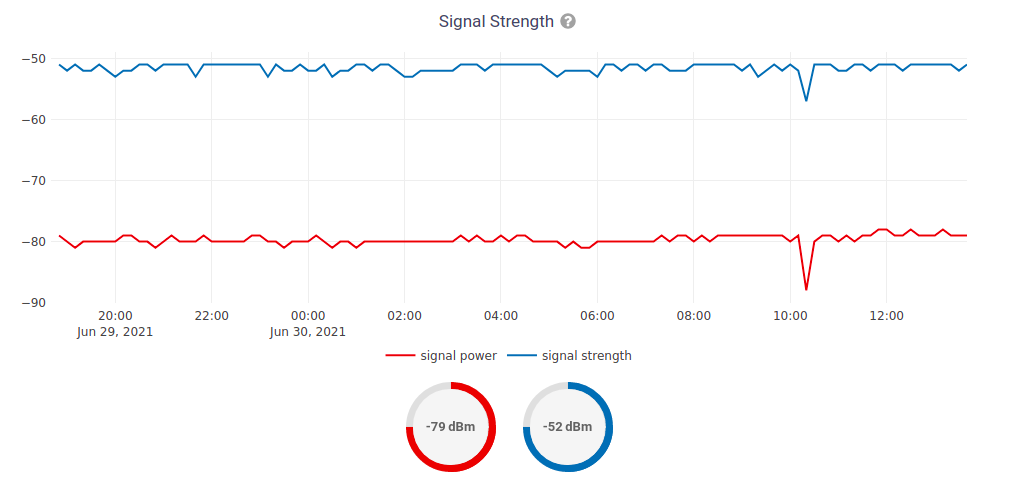
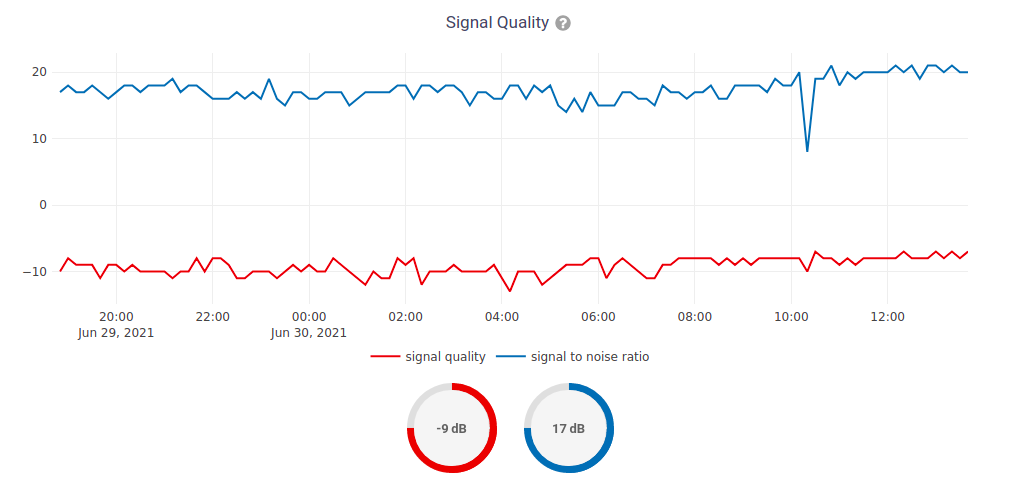
Find out more information about the Monitoring module of OpenWISP.
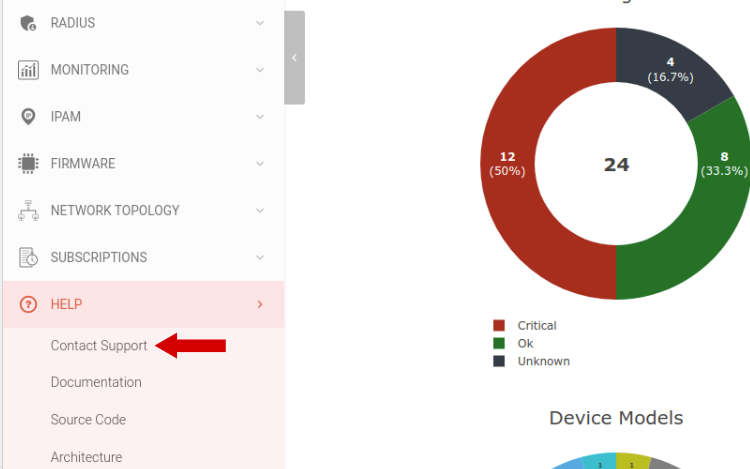
Get help
If you need help or want to request a free 30-day trial of the full feature set, you can write to us via the support channels or just click on the tab Contact support as indicated in the screenshot below.