How to Set Up WiFi Access Point SSIDs
Introduction & Prerequisites
This tutorial shows different ways to set up a WiFi SSID in access point mode on your devices.
The requirement for this to work is that your device must be equipped with
at least one radio and that it is named radio0 in the OpenWrt
configuration (this is the default).
Set Up an Open Access Point SSID on a Device
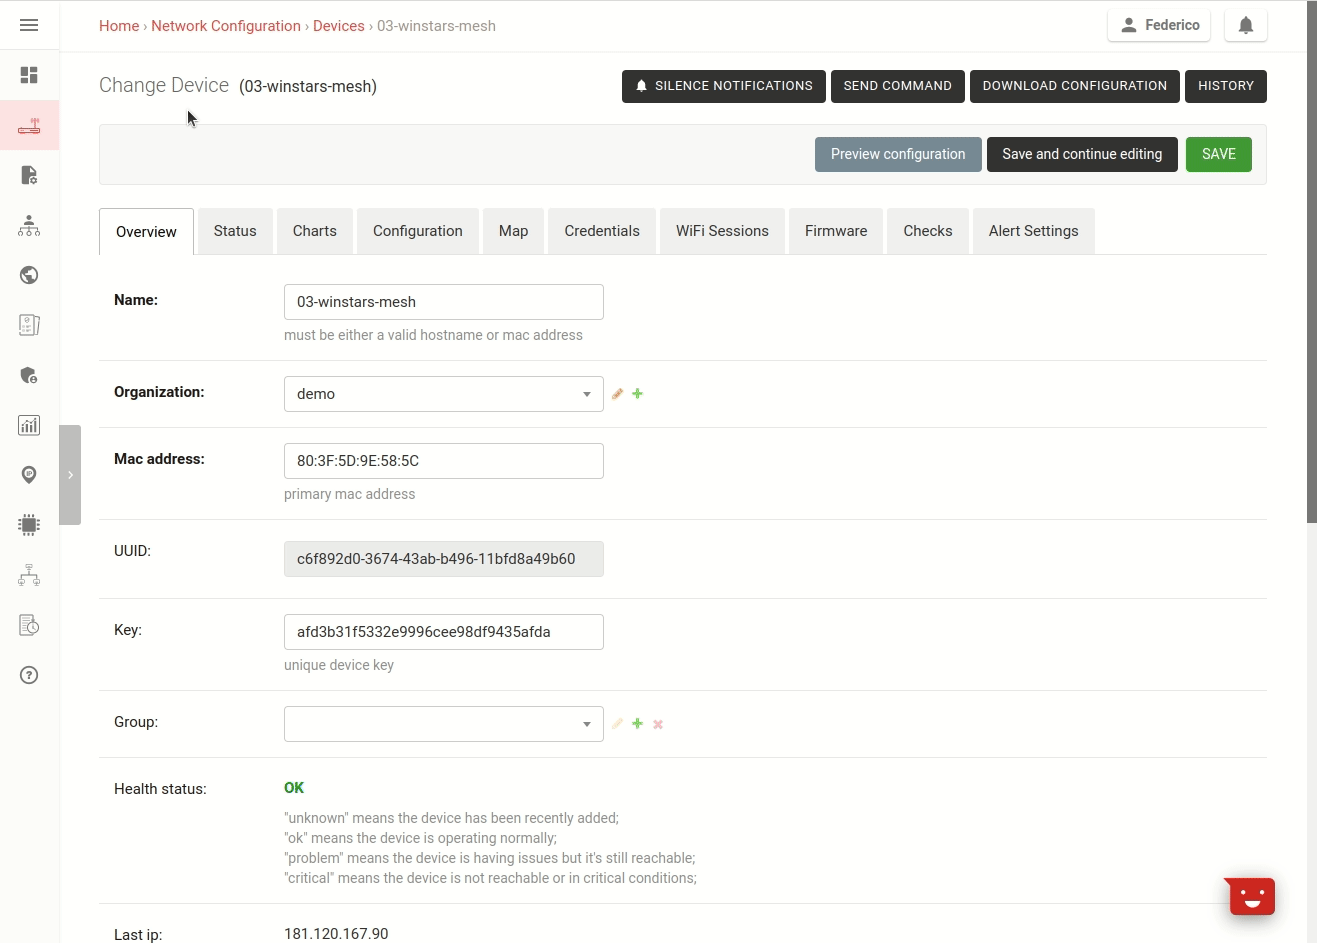
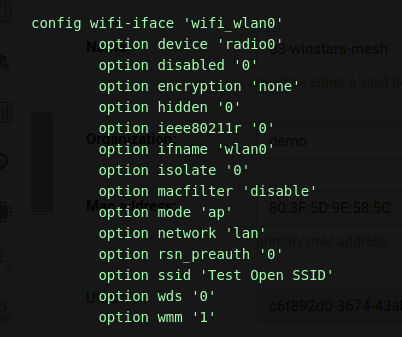
Open the device detail page of your device, then go to the configuration
tab, then scroll down and click on "Configuration Menu", then select
"Interfaces", then click on "Add new interface", select "Wireless
interface", then add wlan0 as interface name, radio0 for the
radio, then type any SSID you want, then in "Attached networks" click on
"Add network" and type lan, this will bridge this WiFi interface to
the LAN interface, now click on "Save and continue".
The screenshot below shows how the preview will look like.
Once the configuration is applied on the device, the SSID will be broadcast.
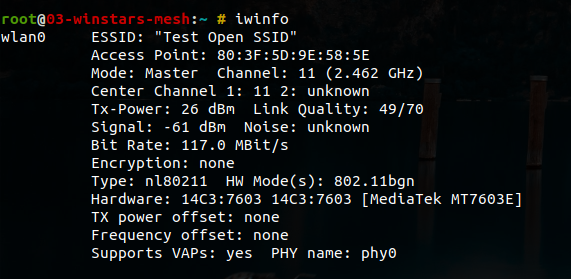
Once clients start to connect to this access point their information will be logged in the WiFi Sessions tab.
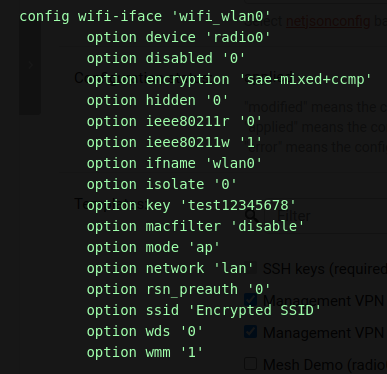
Set Up a WPA Encrypted Access Point SSID on a Device
Open the detail page of your device, then go to the configuration tab,
then scroll down and click on "Configuration Menu", then select
"Interfaces", then click on "Add new interface", select "Wireless
interface", then add wlan0 as interface name, radio0 for the
radio, then type any SSID you want, then in "Attached networks" click on
"Add network" and type lan, this will bridge this WiFi interface to
the LAN interface, now select the desired encryption, for example,
WPA3/WPA2 Personal Mixed Mode, enter the password and finally click on
"Save and continue".
The screenshot below shows how the preview will look like.
Once the configuration is applied on the device, the SSID will be broadcast.
Once clients start to connect to this access point their information will be logged in the WiFi Sessions tab.
Set Up the Same SSID and Password on Multiple Devices
The procedure is very similar to the previous one, with the difference that we will be using a configuration template, then we will assign this template to the devices we want to have the SSID.
In this example we are defining two configuration variables: wlan0_ssid and wlan0_password, this
allows us to change the SSID and password on a specific device if we need.
Below you can find a demonstration of how to change these default template
values from the device page in the "configuration variables" section.
The template can even be flagged as "Default" if we want this to be applied automatically when new devices register!
Hint
If you want to find out more about configuration templates and/or variables, consult the respective documentation sections:
Multiple SSIDs, multiple radios
Dual radio (2.4 GHz and 5 GHz) hardware is very common nowadays.
Multiple WiFi interfaces can be created for each available radio, as long as they have different names. The SSID can be the same, although this only makes sense for having the same SSID broadcast on different WiFi bands (e.g.: 2.4 GHz and 5 GHz).
In order to do this, just repeat the procedure shown in the previous
sections, with the difference that instead of adding only one interface,
you will have to add multiple wireless interfaces and define a different
name and, if you want to deploy the SSID on different bands, a
different value for the radio field, e.g. radio0 and radio1.
Roaming (802.11r: Fast BSS Transition)
Fast transition enables WiFi clients to seamlessly roam between access points without interrupting media flows, such as video or phone calls, streaming, etc., caused by delays in re-authentication.
Enabling 802.11r on OpenWrt via OpenWISP can be easily done with the following steps:
Prepare a WiFi AP template as explained in the previous sections, ensuring that the SSID used on the access points remains consistent.
Check the "roaming" checkbox.
Check the "FT PSK generate local" checkbox.
Increase the default "reassociation deadline" to at least 2000.
Save the changes.

To verify whether WiFi clients are roaming between APs, launch the shell
command logread -f on each AP. Then, move the WiFi client from one AP
to another, making sure they are sufficiently distant.
When the WiFi client successfully transitions from one AP to another, you should see log lines like:
WPA: FT authentication already completed - do not start 4-way handshake
You may wish to test the configuration and adjust the following options:
Reassociation deadline: Increase it to avoid frequent timeouts on busy networks.
FT-over-DS.
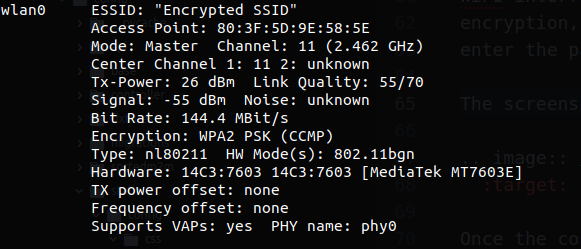
Monitoring WiFi Clients
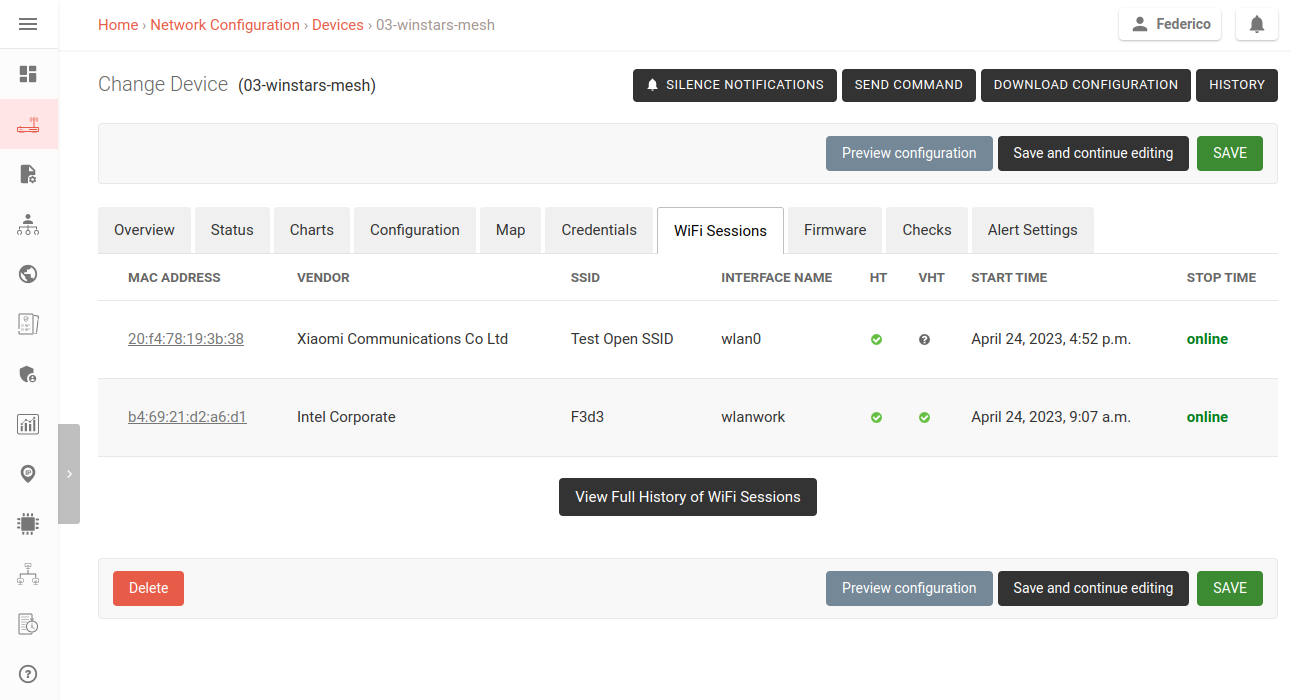
Since OpenWISP 23, in the device page, whenever any WiFi client data is collected by the Monitoring module of OpenWISP, a "WiFi Sessions" tab will appear as in the screenshot above, showing WiFi clients connected right now.
The data is sent by default by devices every 5 minutes.
Clicking on "Full History of WiFi Sessions" will redirect to the full list of all clients which have connected to this access point, as shown below.
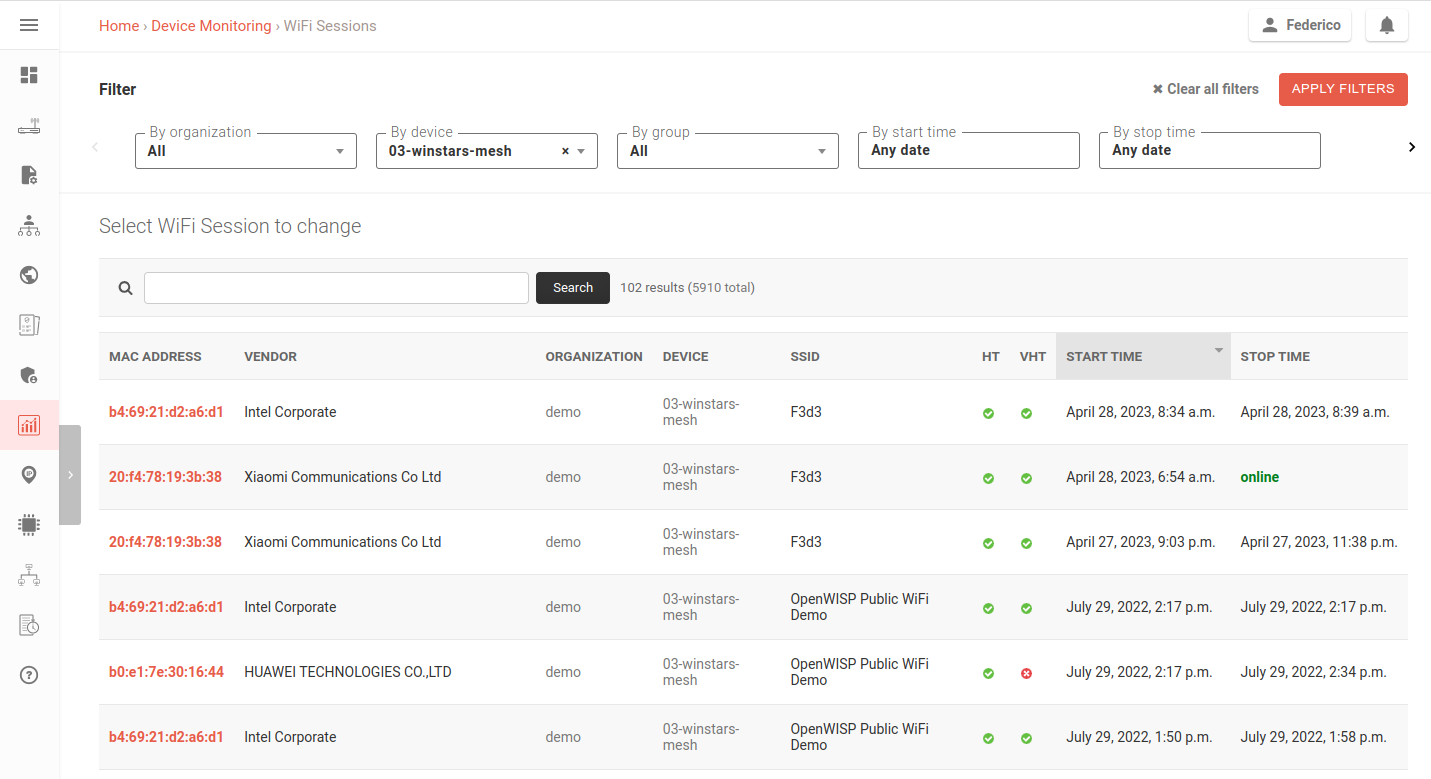
In this page it will be possible to use more filters and even perform a text search.