Quick Start Guide
Requirements
Devices running at least OpenWrt 12.09 Attitude Adjustment, older versions of OpenWrt have not worked at all in our tests
Devices must have enough free RAM to be able to upload the new image to
/tmp
1. Create a Category
Create a category for your firmware images by going to Firmware management > Firmware categories > Add firmware category, if you use only one firmware type in your network, you could simply name the category "default" or "standard".
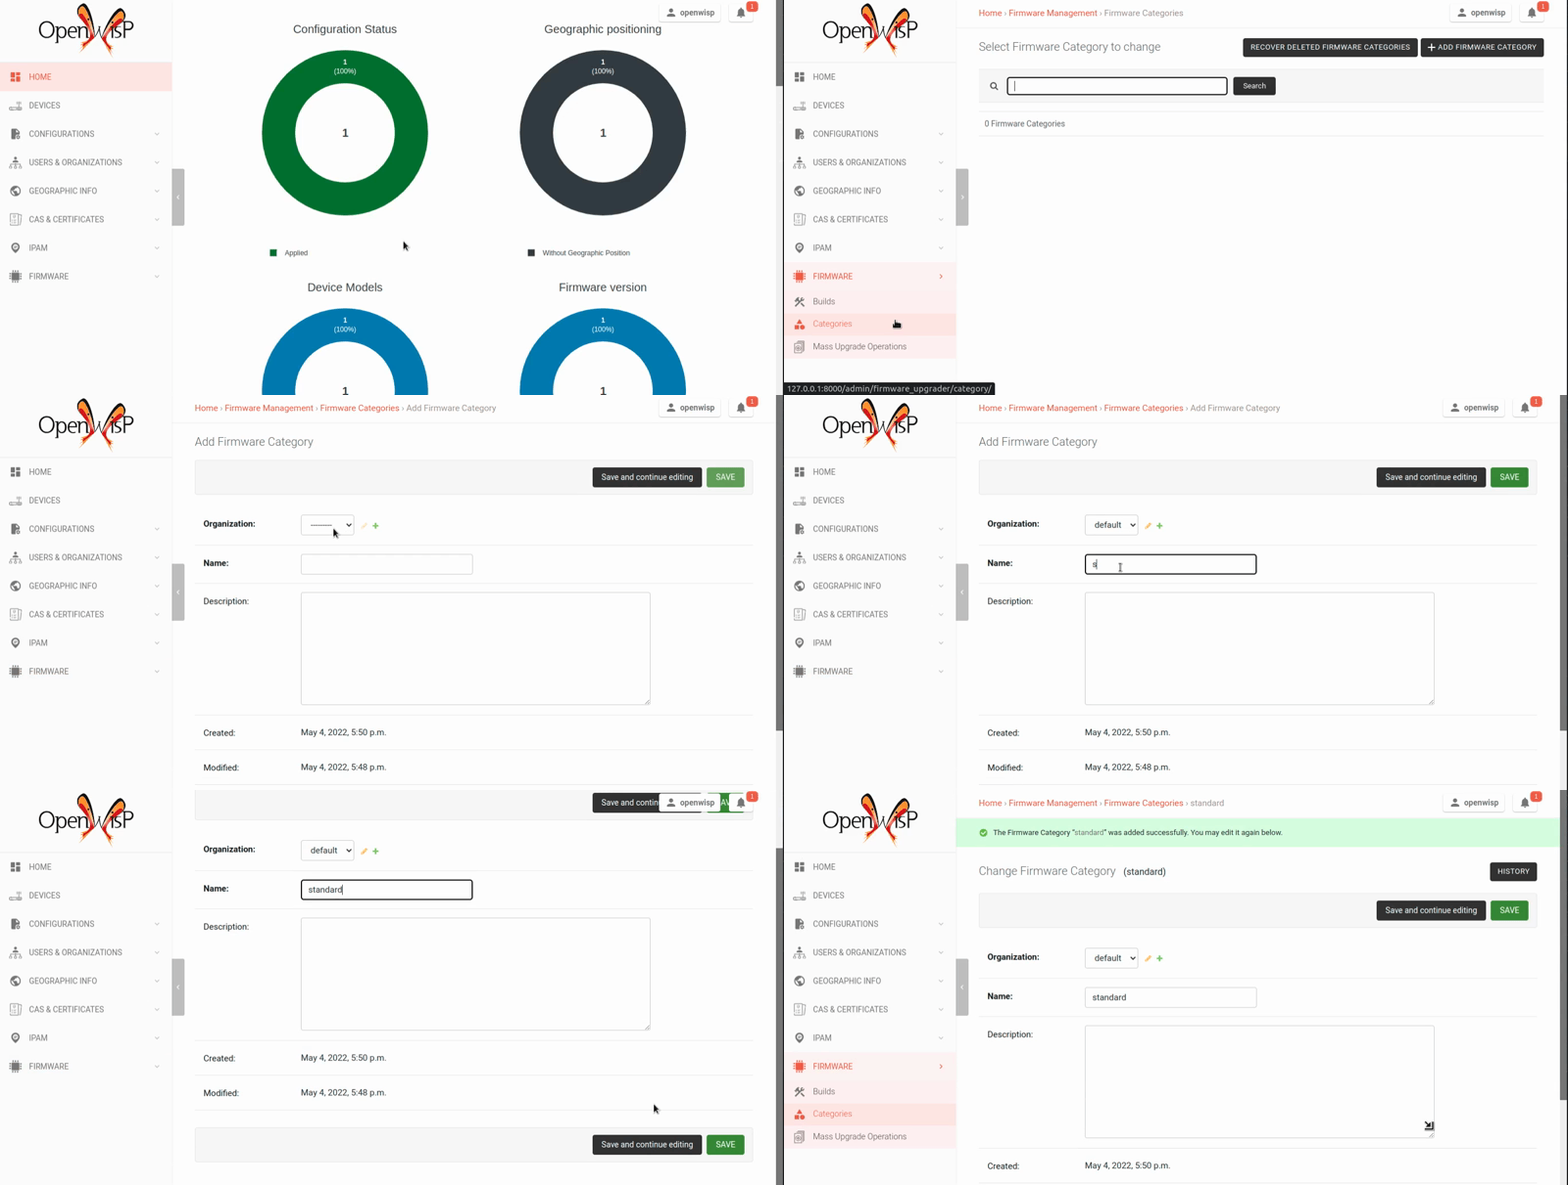
If you use multiple firmware images with different features, create one category for each firmware type, e.g.:
WiFi
SDN router
LoRa Gateway
This is necessary in order to perform mass upgrades only on specific firmware categories when, for example, a new LoRa Gateway firmware becomes available.
Note
A category can be either organization-specific or shared (not linked to any organization). Firmwares assigned to an organization-specific category can only be accessed and used within that organization.
If no organization is specified when creating a category, it becomes a shared category. Firmwares in a shared category are available to all organizations in the system.
2. Create the Build Object
Create a build object by going to Firmware management > Firmware builds > Add firmware build, the build object is related to a firmware category and is the collection of the different firmware images which have been compiled for the different hardware models supported by the system.
The version field indicates the firmware version, the change log field is optional but we recommend filling it to help operators know the differences between each version.
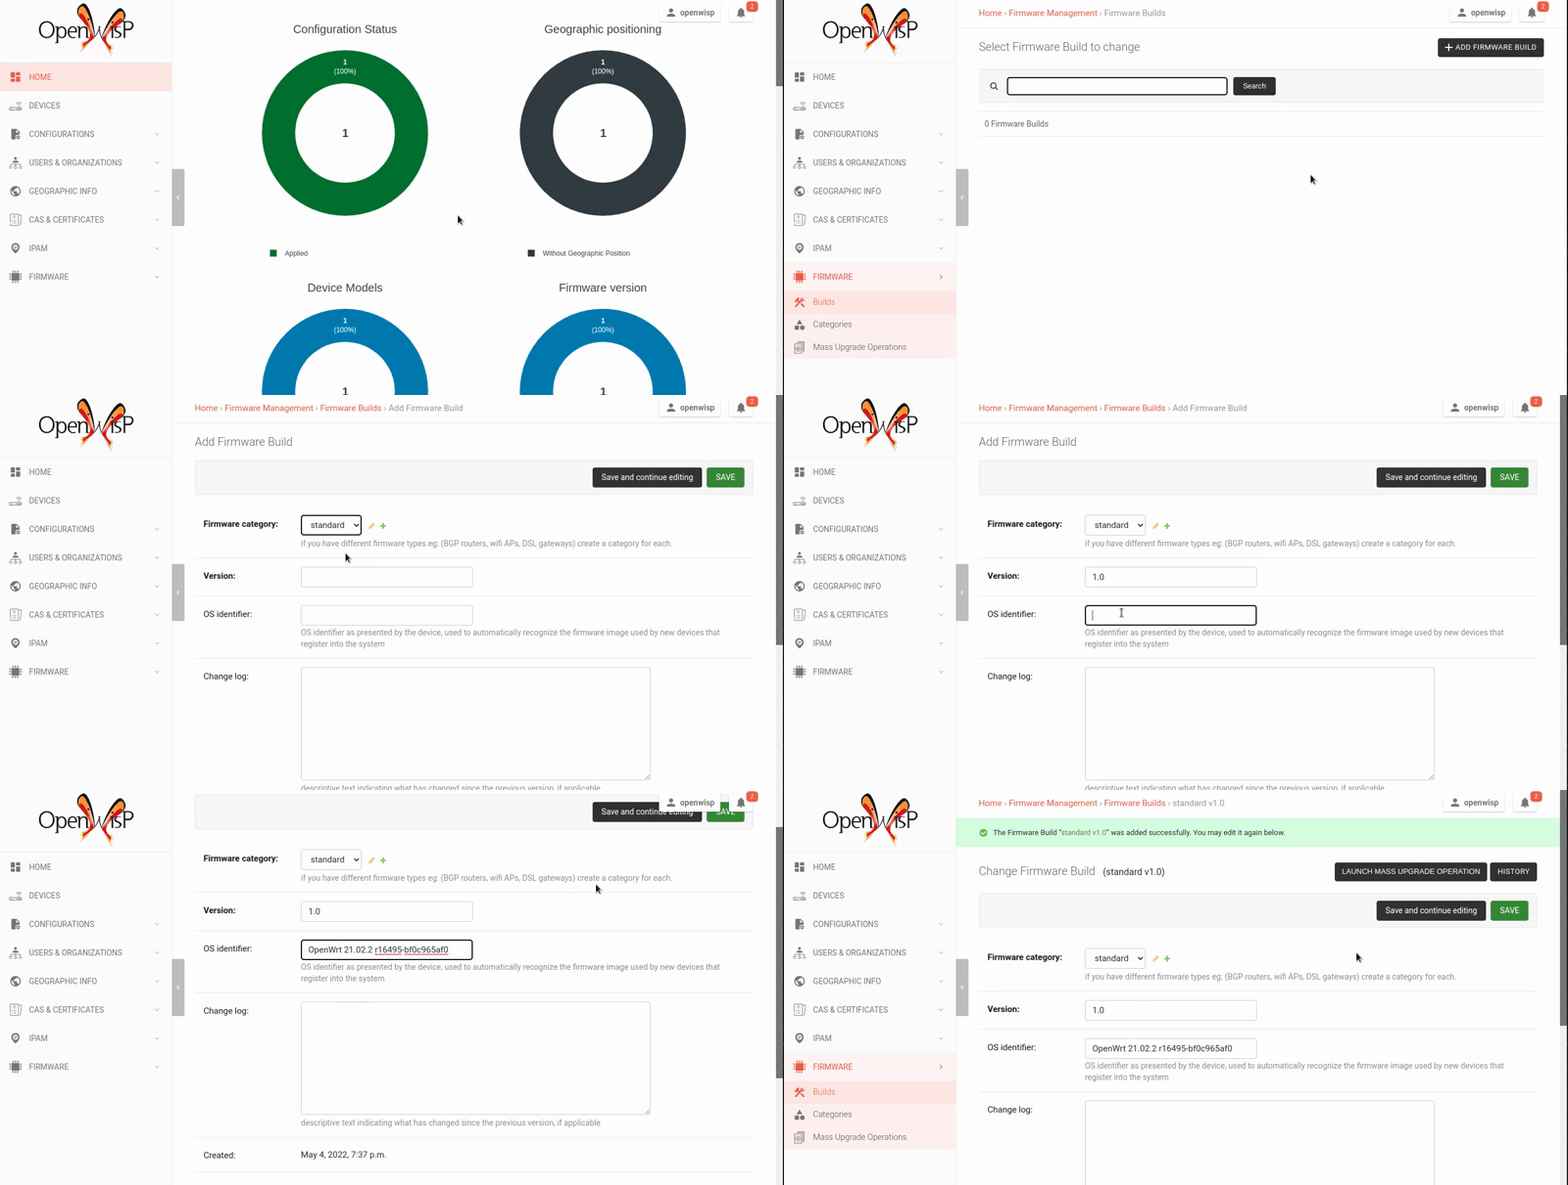
An important but optional field of the build model is OS identifier,
this field should match the value of the Operating System field which
gets automatically filled during device registration, e.g.: OpenWrt
19.07-SNAPSHOT r11061-6ffd4d8a4d. It is used by the firmware-upgrader
module to automatically create DeviceFirmware objects for existing
devices or when new devices register. A DeviceFirmware object
represent the relationship between a device and a firmware image, it
basically tells us which firmware image is installed on the device.
To find out the exact value to use, you should either do a test flash on a device and register it to the system or you should inspect the firmware image by decompressing it and find the generated value in the firmware image.
If you're not sure about what OS identifier to use, just leave it empty, you can fill it later on when you find out.
Now save the build object to create it.
3. Upload Images to the Build
Now is time to add images to the build, we suggest adding one image at time. Alternatively the REST API can be used to automate this step.
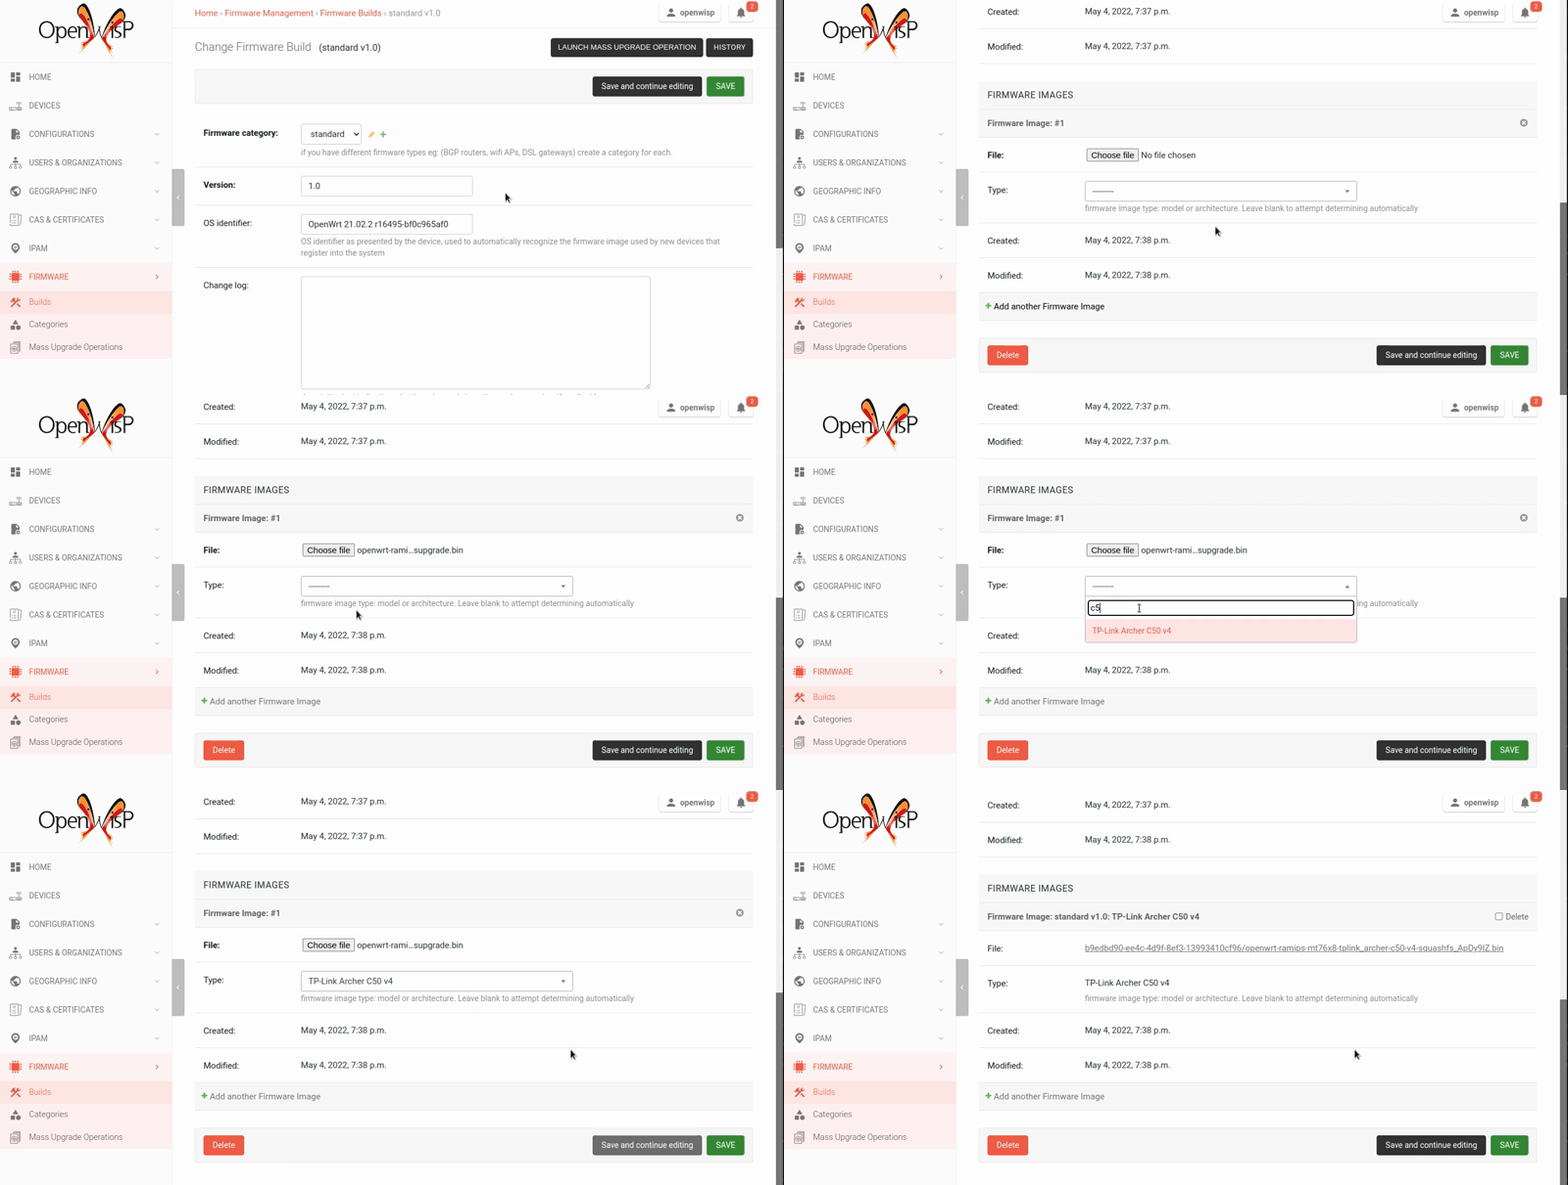
If you use a hardware model which is not listed in the image types, if the hardware model is officially supported by OpenWrt, you can send us a pull-request to add it, otherwise you can use the setting OPENWISP_CUSTOM_OPENWRT_IMAGES to add it.
4. Perform a Firmware Upgrade to a Specific Device
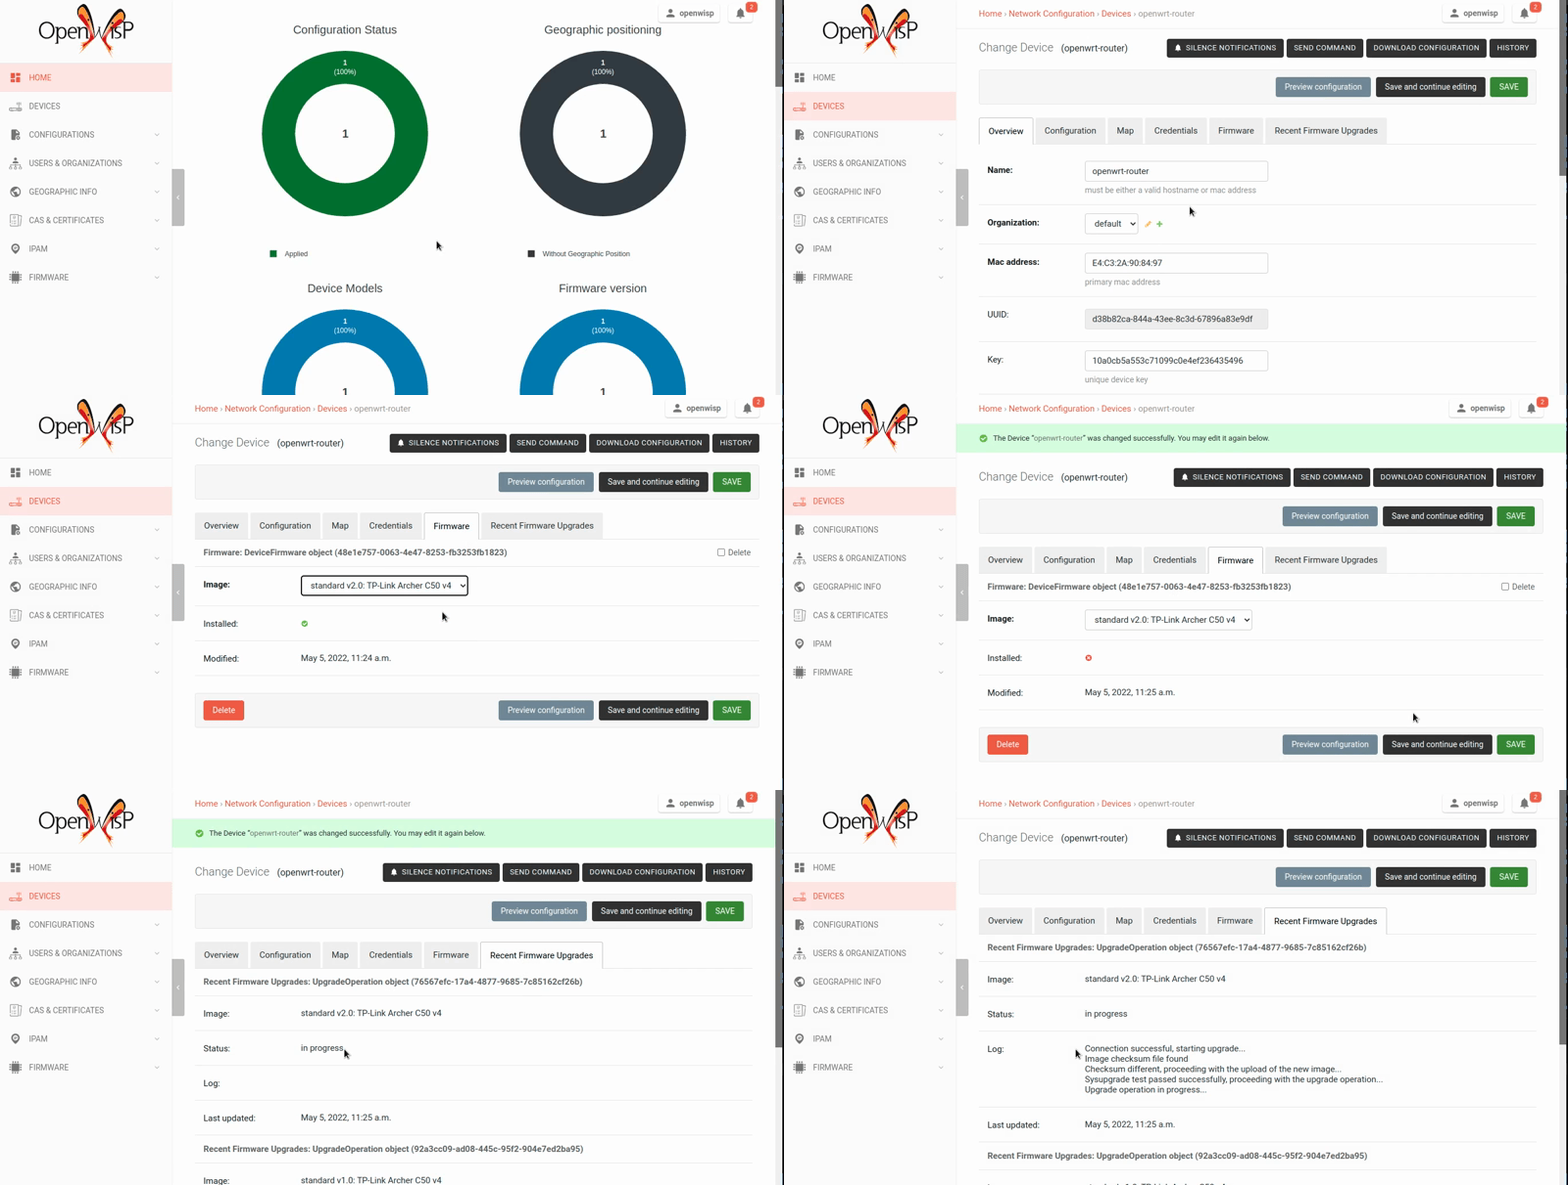
Once a new build is ready, has been created in the system and its image have been uploaded, it will be the time to finally upgrade our devices.
To perform the upgrade of a single device, navigate to the device details, then go to the "Firmware" tab.
If you correctly filled OS identifier in step 2, you should have a
situation similar to the one above: in this example, the device is using
version 1.0 and we want to upgrade it to version 2.0, once the new
firmware image is selected we just have to hit save, then a new tab will
appear in the device page which allows us to see what's going on during
the upgrade.
Right now, the update of the upgrade information is not asynchronous yet, so you will have to reload the page periodically to find new information. This will be addressed in a future release.
5. Performing Mass Upgrades
Before proceeding, please ensure the following preconditions are met:
the system is configured correctly
the new firmware images are working as expected
you already tried the upgrade of single devices several times.
At this stage you can try a mass upgrade by doing the following:
go to the build list page
select the build which contains the latest firmware images you want the devices to be upgraded with
click on "Mass-upgrade devices related to the selected build".
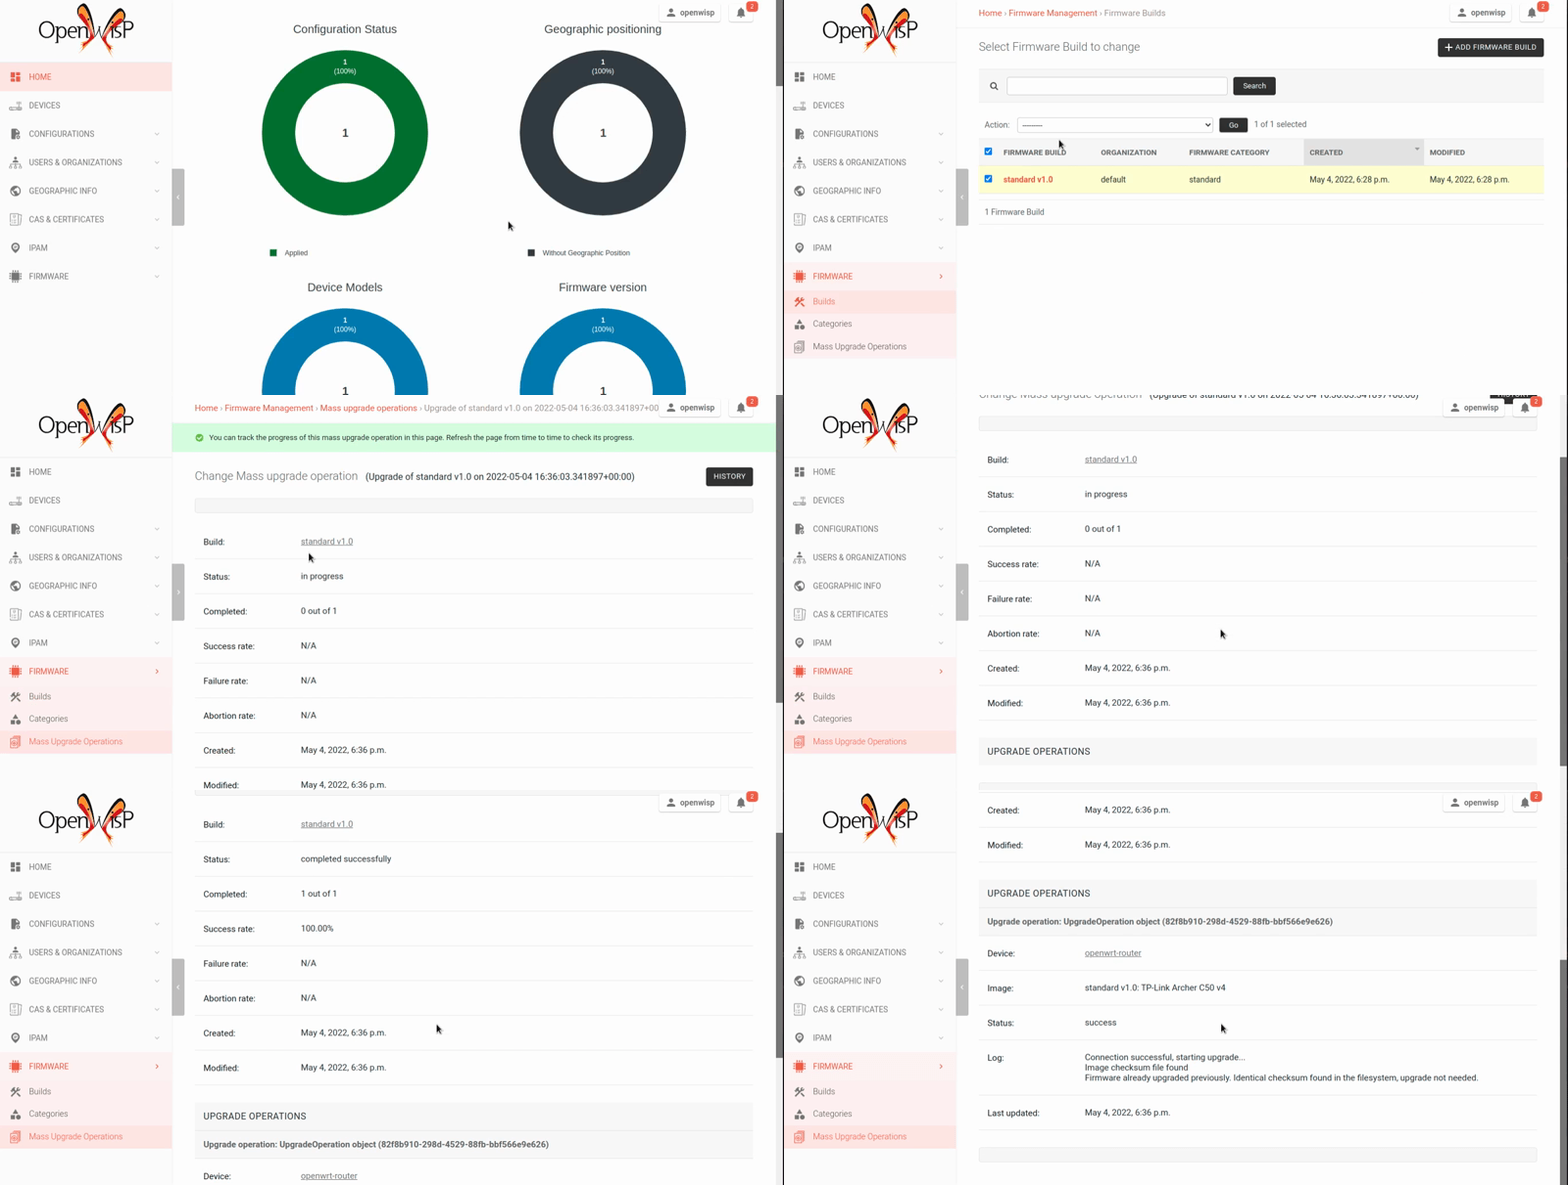
At this point you should see a summary page which will inform you of which devices are going to be upgraded, you can either confirm the operation or cancel.
Once the operation is confirmed you will be redirected to a page in which you can monitor the progress of the upgrade operations.
Right now, the update of the upgrade information is not asynchronous yet, so you will have to reload the page periodically to find new information. This will be addressed in a future release.