Automating WireGuard Tunnels
Important
This guide assumes your OpenWrt firmware has the wireguard-tools
package and its dependencies installed. If these packages are not
present, you will need to install them.
This guide will help you to set up the automatic provisioning of WireGuard tunnels for your devices.
Note
This guide creates the VPN server and VPN client templates as Shared systemwide (no organization) objects. This allows any device of any organization to use the automation.
If needed, you can use any organization as long as the VPN server, the VPN client template, and devices have the same organization.
1. Create VPN Server Configuration for WireGuard
Visit
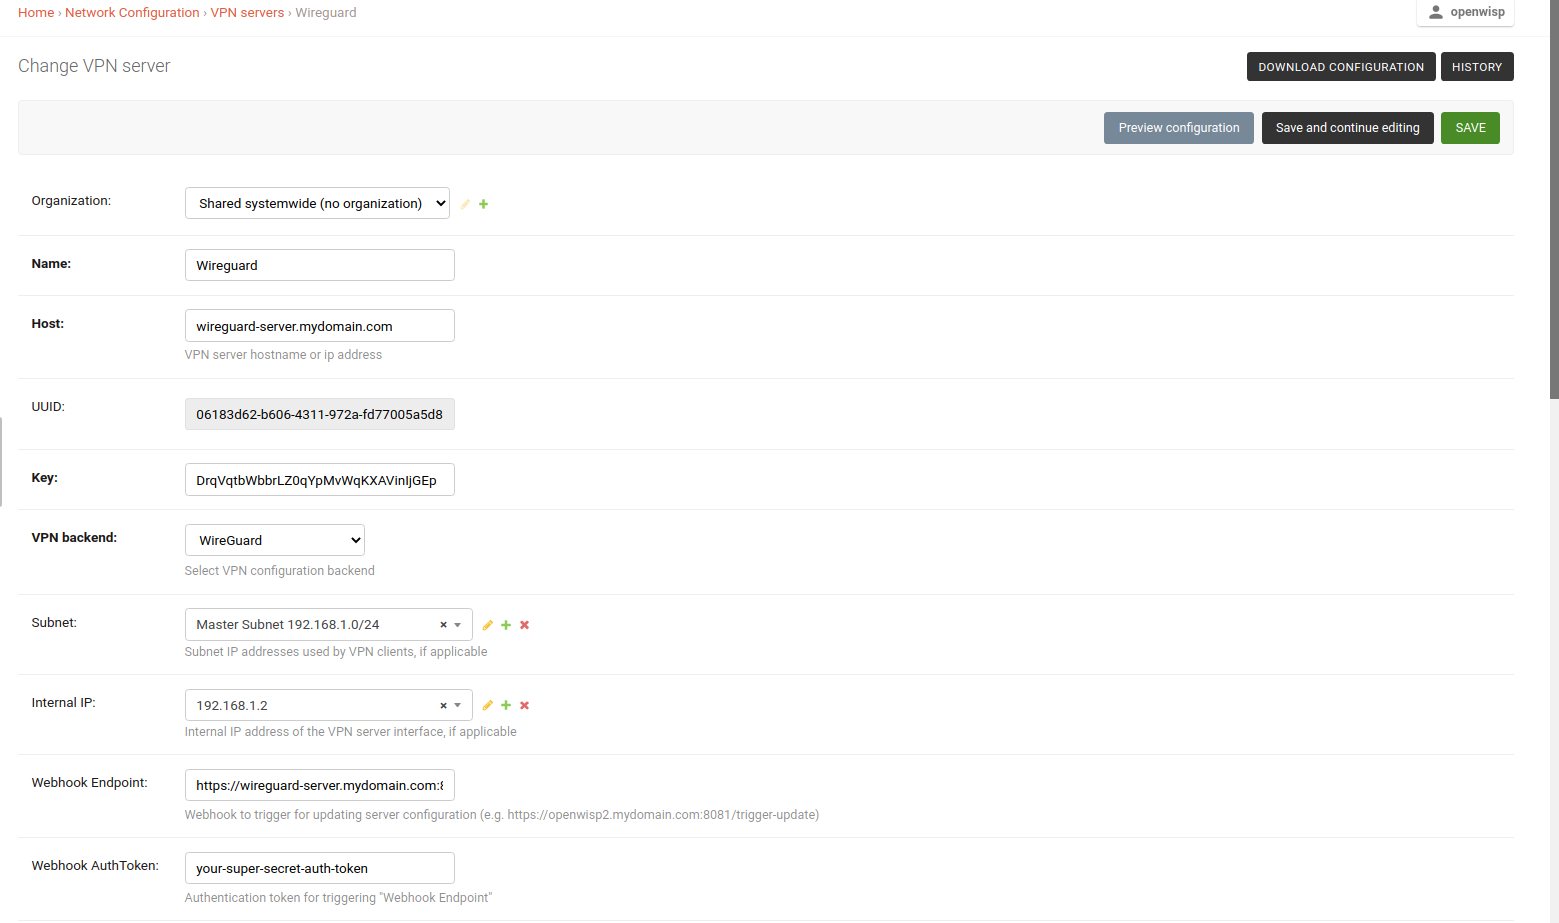
/admin/config/vpn/add/to add a new VPN server.Set the Name of this VPN server as
WireGuardand the Host aswireguard-server.mydomain.com(update this to point to your WireGuard VPN server).Select
WireGuardfrom the dropdown as the VPN Backend.When using WireGuard, OpenWISP takes care of managing IP addresses, assigning an IP address to each VPN peer. Create a new subnet or select an existing one from the dropdown menu. You can also assign an Internal IP to the WireGuard Server or leave it empty for OpenWISP to configure. This IP address will be used by the WireGuard interface on the server.
Set the Webhook Endpoint as
https://wireguard-server.mydomain.com:8081/trigger-updatefor this example. Update this according to your VPN upgrader endpoint. Set Webhook AuthToken to any strong passphrase; this will be used to ensure that configuration upgrades are requested from trusted sources.Note
If you are setting up a WireGuard VPN server, substitute
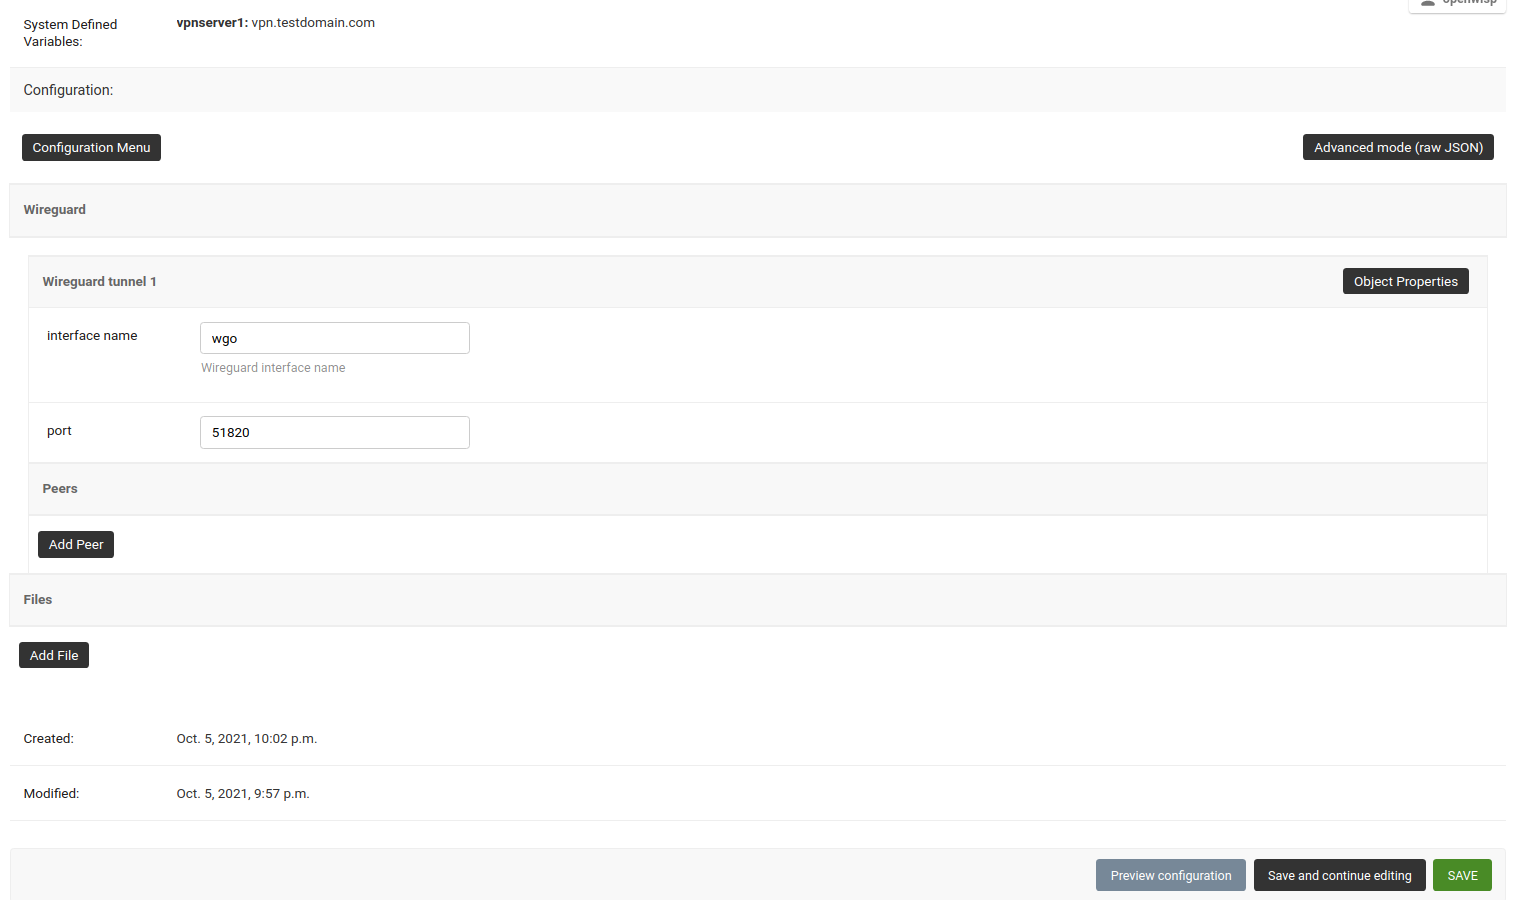
wireguard-server.mydomain.comwith the hostname of your VPN server and follow the steps in the next section.Under the configuration section, set the name of the WireGuard tunnel 1 interface. In this example, we have used
wg0.
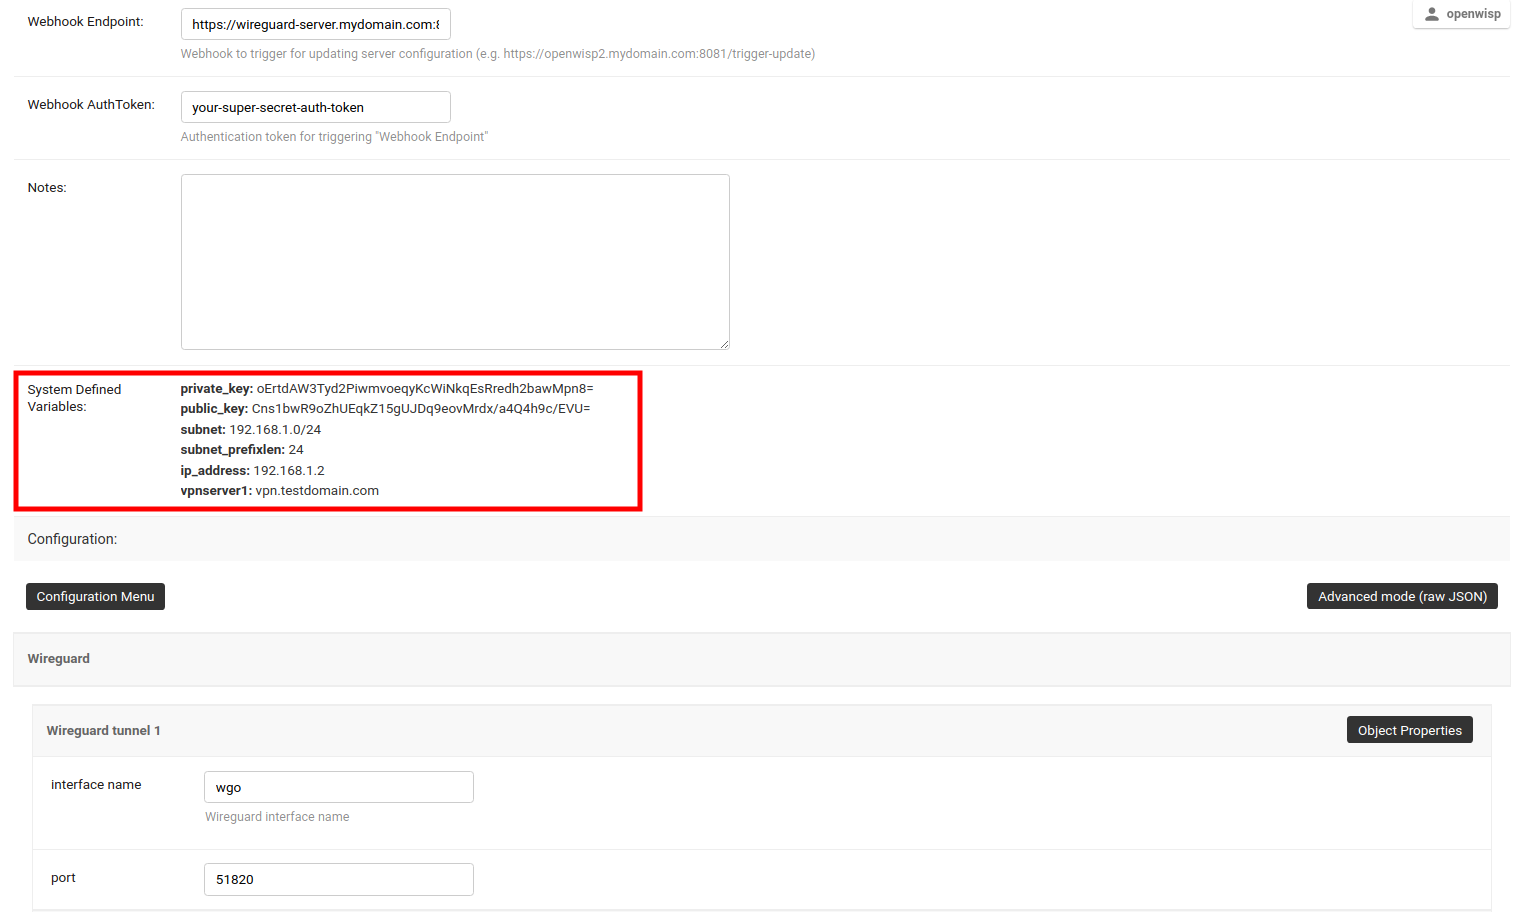
After clicking on Save and continue editing, you will see that OpenWISP has automatically created public and private keys for the WireGuard server in System Defined Variables, along with internal IP address information.
2. Deploy WireGuard VPN Server
If you haven't already set up WireGuard on your VPN server, this would be a good time to do so.
We recommend using the ansible-wireguard-openwisp role for installing WireGuard, as it also installs scripts that allow OpenWISP to manage the WireGuard VPN server.
Ensure that the VPN server attributes used in your playbook match the VPN server configuration in OpenWISP.
3. Create VPN Client Template for WireGuard VPN Server
Visit
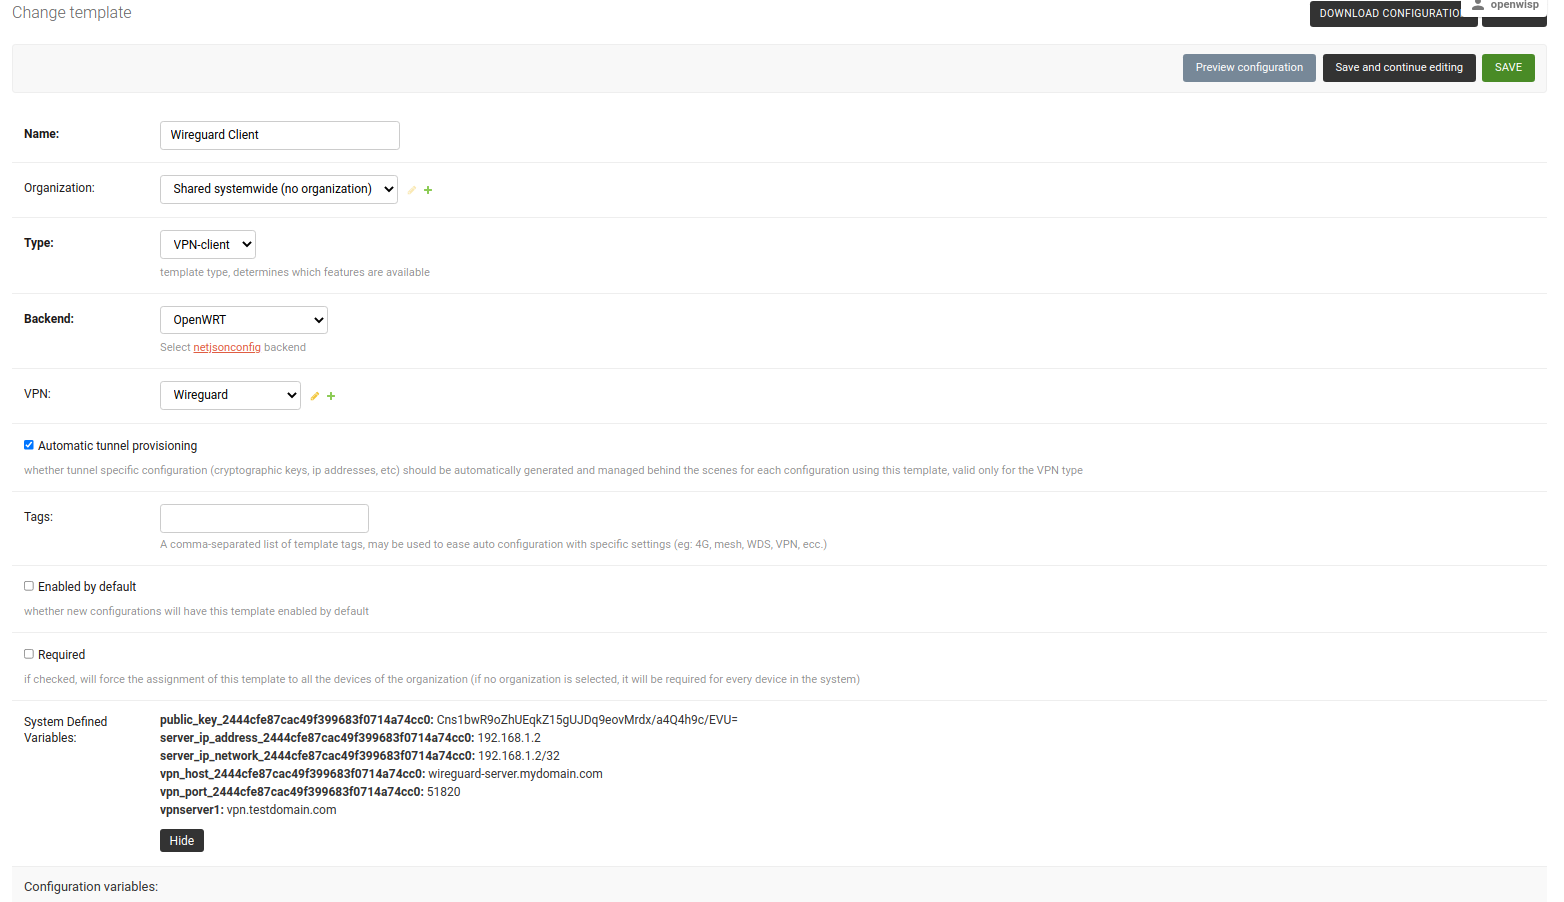
/admin/config/template/add/to add a new template.Set
WireGuard Clientas Name (you can set whatever you want) and selectVPN-clientas type from the dropdown list.The Backend field refers to the backend of the device this template can be applied to. For this example, we will leave it to
OpenWrt.Select the correct VPN server from the dropdown for the VPN field. Here it is
WireGuard.Ensure that Automatic tunnel provisioning is checked. This will make OpenWISP to automatically generate public and private keys and provision IP address for each WireGuard VPN client.
After clicking on Save and continue editing button, you will see details of WireGuard VPN server in System Defined Variables. The template configuration will be automatically generated which you can tweak accordingly. We will use the automatically generated VPN client configuration for this example.
4. Apply WireGuard VPN Template to Devices
Note
This step assumes that you already have a device registered on OpenWISP. Register or create a device before proceeding.
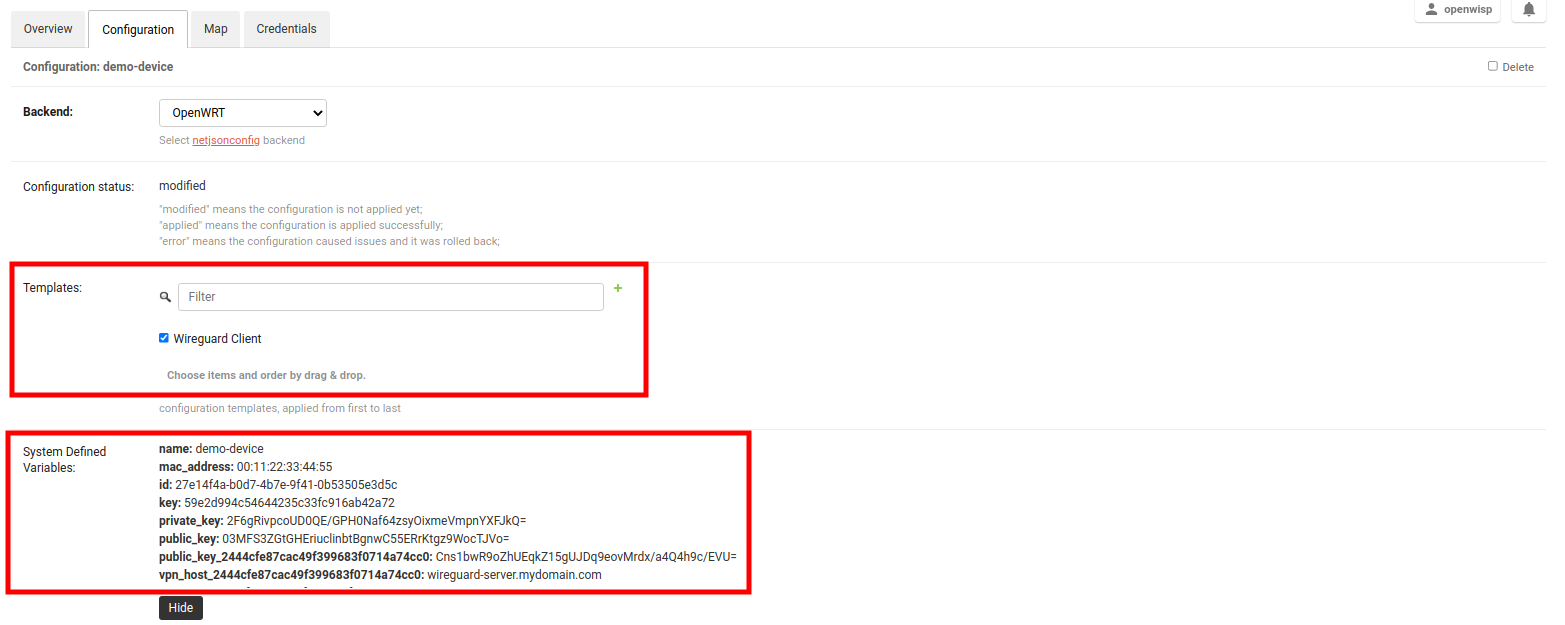
Open the Configuration tab of the concerned device.
Select the WireGuard Client template.
Upon clicking on Save and continue editing button, you will see some entries in System Defined Variables. It will contain internal IP address, private and public key for the WireGuard client on the device along with details of WireGuard VPN server.
Voila! You have successfully configured OpenWISP to manage WireGuard tunnels for your devices.
See also
You may also want to explore other automated VPN tunnel provisioning options: