Configuring Push Operations
Introduction
Important
If you have installed OpenWISP with one of the Official installers you can skip the following steps, which are handled automatically during the first installation.
The Ansible role automatically creates a default template to update
authorized_keys on networking devices using the default access
credentials.
Follow the procedure described below to enable secure SSH access from OpenWISP to your devices, this is required to enable push operations (whenever the configuration is changed, OpenWISP will trigger the update in the background) and/or firmware upgrades (via the additional module openwisp-firmware-upgrader).
1. Generate SSH Key
First of all, we need to generate the SSH key which will be used by OpenWISP to access the devices, to do so, you can use the following command:
ssh-keygen -f ./sshkey -t ed25519 -C "openwisp" -N ""
This will create two files in the current directory, one called sshkey
(the private key) and one called sshkey.pub (the public key).
Store the content of these files in a secure location.
Note
Support for ED25519 was added in OpenWrt 21.02 (requires Dropbear > 2020.79). If you are managing devices with OpenWrt < 21, then you will need to use RSA keys:
ssh-keygen -f ./sshkey -t rsa -b 4096 -C "openwisp"
2. Save SSH Private Key in "Access Credentials"
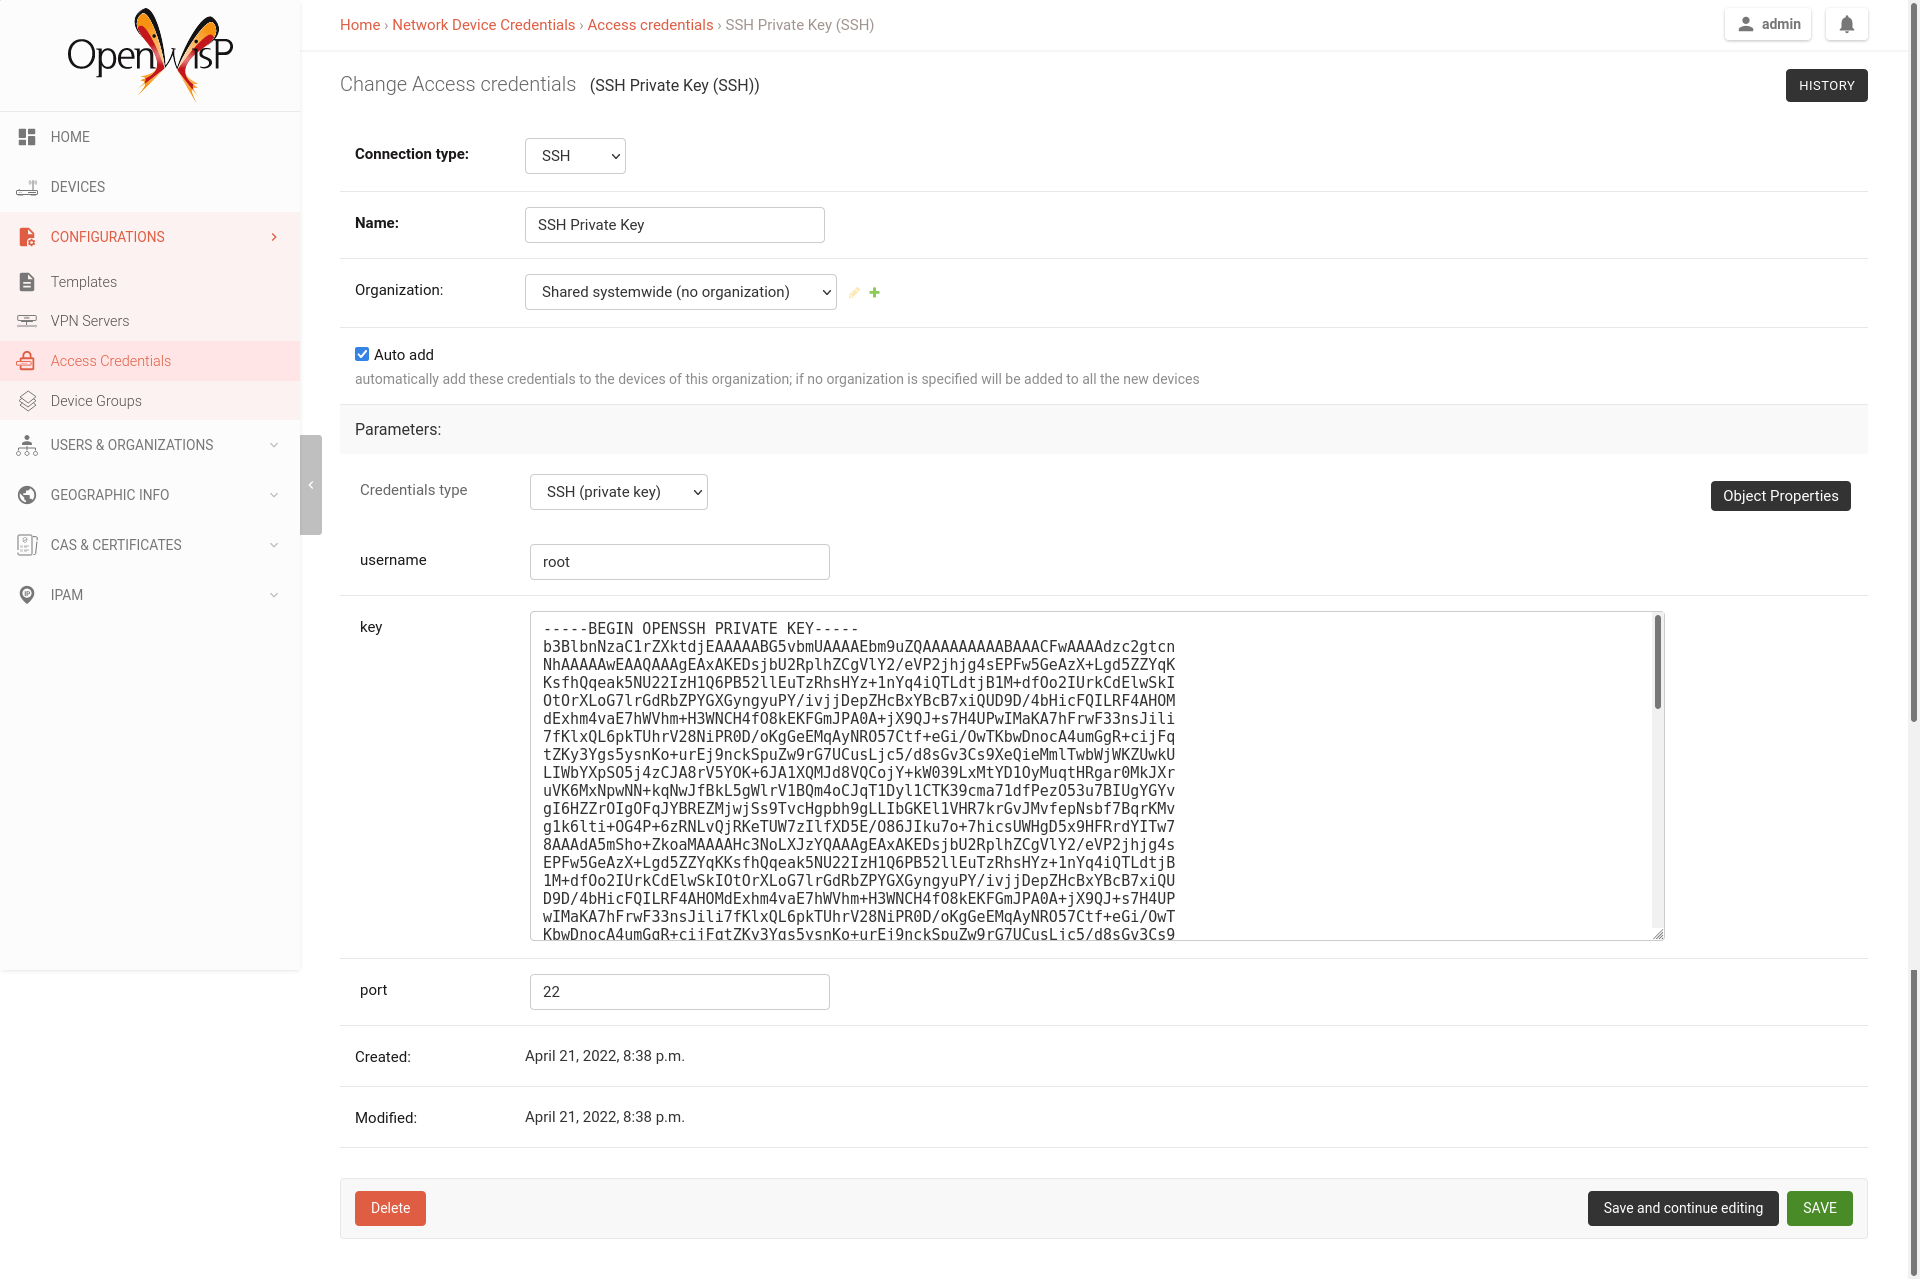
From the first page of OpenWISP click on "CONFIGURATIONS" in the left
navigation menu, then "Access credentials", then click on the "ADD
ACCESS CREDENTIALS" button in the upper right corner (alternatively, go
to the following URL path: /admin/connection/credentials/add/).
Select SSH as type, enable the Auto add checkbox, then at the
field "Credentials type" select "SSH (private key)", now type "root" in
the username field, while in the key field you have to paste the
contents of the private key just created.
Now hit save.
The credentials just created will be automatically enabled for all the devices in the system (both existing devices and devices which will be added in the future).
3. Add the Public Key to Your Devices

Now we need to instruct your devices to allow OpenWISP accessing via SSH,
in order to do this we need to add the contents of the public key file
created in step 1 (sshkey.pub) in the file
/etc/dropbear/authorized_keys on the devices, the recommended way to
do this is to create a configuration template in OpenWISP: from the first
page of OpenWISP, click on "CONFIGURATIONS" in the left navigation menu,
then and click on the "ADD TEMPLATE" button in the upper right corner
(alternatively, go to the following URL: /admin/config/template/add/).
Check enabled by default, then scroll down the configuration section,
click on "Configuration Menu", scroll down, click on "Files" then close
the menu by clicking again on "Configuration Menu". Now type
/etc/dropbear/authorized_keys in the path field of the file, then
paste the contents of sshkey.pub in contents.
Now hit save.
There's a catch: you will need to assign the template to any existing device.
4. Test It
Once you have performed the 3 steps above, you can test it as follows:
Ensure there's at least one device turned on and connected to OpenWISP, ensure this device has the "SSH Authorized Keys" assigned to it.
Ensure the celery worker of OpenWISP Controller is running (e.g.:
ps aux | grep celery)SSH into the device and wait (maximum 2 minutes) until
/etc/dropbear/authorized_keysappears as specified in the template.While connected via SSH to the device run the following command in the console:
logread -f, now try changing the device name in OpenWISPShortly after you change the name in OpenWISP, you should see some output in the SSH console indicating another SSH access and the configuration update being performed.