How to Set Up WPA Enterprise (EAP-TTLS-PAP) Authentication
Introduction & Prerequisites
In this tutorial, we will guide you on how to set up WPA Enterprise (EAP-TTLS-PAP) authentication for WiFi networks using OpenWISP. The RADIUS capabilities of OpenWISP provide integration with FreeRADIUS to allow users to authenticate with their Django user accounts. Users can either be created manually via the admin interface, generated with voucher-like codes, imported from CSV or can register autonomously via the REST API of OpenWISP RADIUS.
Enable OpenWISP RADIUS
Note
If you are following this tutorial on our Demo System, you can skip this step.
To use WPA2 Enterprise, the RADIUS module must be enabled first.
See Enabling the RADIUS Module in the Ansible OpenWISP role. In Docker OpenWISP, the RADIUS module is enabled by default.
VPN Tunnel
We recommend setting up a VPN tunnel to secure the communication between the RADIUS server and the NAS devices.
Routing unencrypted RADIUS traffic through the internet is not recommended for security. When security breaches in the RADIUS protocol are discovered (like the "Blast-RADIUS attack" in July 2024), your entire network would be at risk.
If you are using OpenWrt, you can use OpenWISP to automate the provisioning of OpenVPN tunnels on your OpenWrt devices. For more information, please refer to Automating OpenVPN Tunnels.
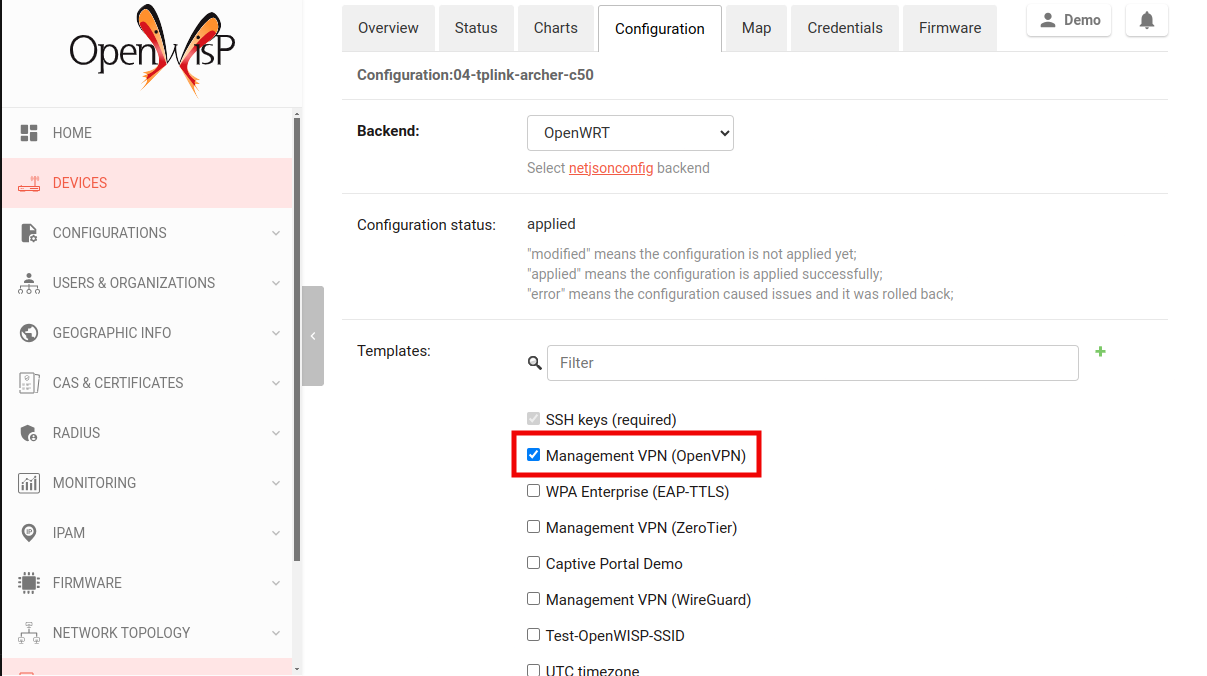
Note
If you are following this tutorial on our Demo System,
the Management VPN (OpenVPN) template will be applied to your
device by default. If not, you need to enable that template on your
device. Otherwise, your device won't connect to the FreeRADIUS server.
Using radsec (RADIUS over TLS) is a good option, but it's not covered in this tutorial.
Firmware Requirements
To use WPA Enterprise authentication, your firmware needs to be equipped
with a version of the wpad package that supports WPA Enterprise
encryption.
Please refer to the OpenWrt WPA encryption documentation for more information.
In tutorial we use OpenVPN to tunnel RADIUS packets from NAS devices to
FreeRADIUS, for this reason you must ensure that your OpenWrt device has
the openvpn package installed.
Note
The OpenWrt firmware image provided for the OpenWISP Demo
System includes openvpn and the full wpad package by
default.
One Radio Available
At least one radio named radio0 needs to be available and enabled for
the successful execution of this tutorial.
For simplicity, we will focus on a single radio, but it's important to note that the WPA Enterprise functionality can be extended to multiple radios if necessary.
Alternatively, you have the option of using WPA Enterprise encryption on one radio while the other radios use different encryption methods. However, these additional scenarios are not explained in this tutorial and are left as an exercise for the reader.
Configuring FreeRADIUS for WPA Enterprise
Note
If you are following this tutorial on our Demo System, you can skip this step.
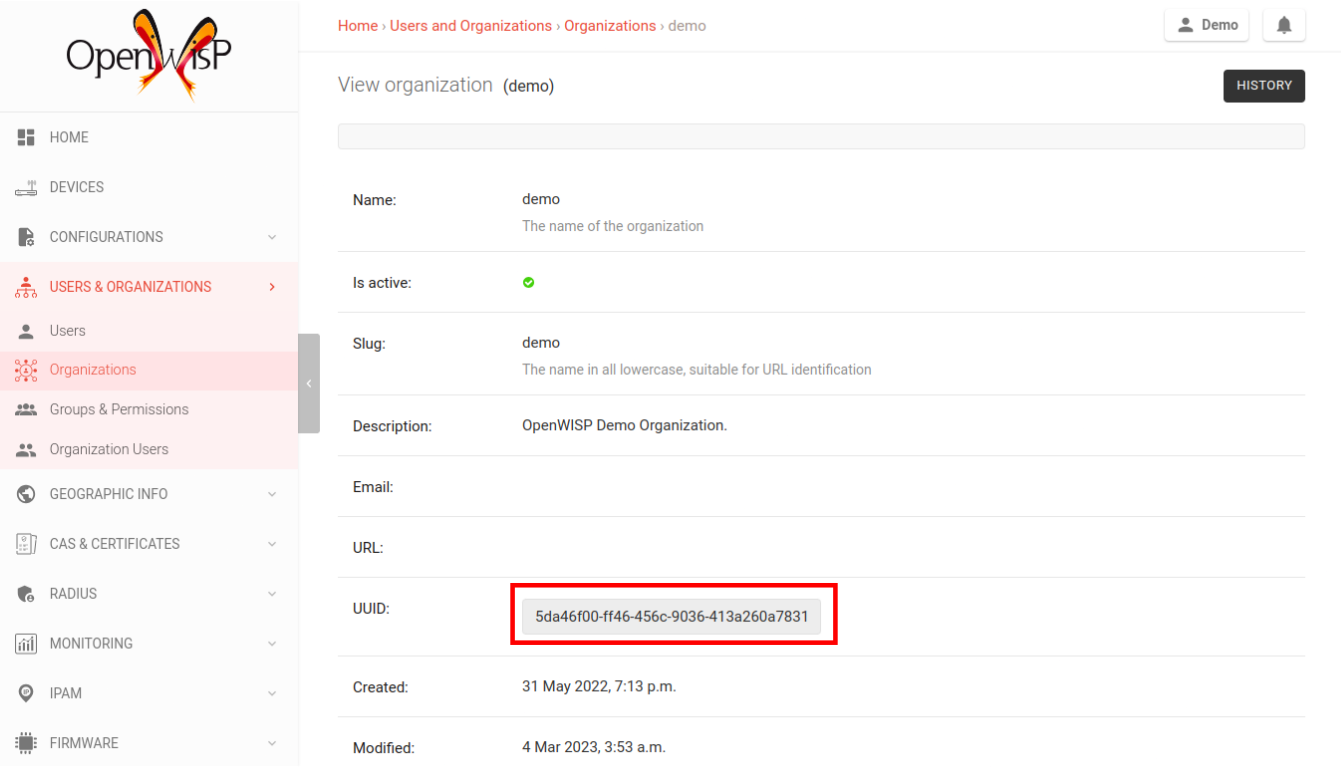
Before making changes to the FreeRADIUS configuration, we need to gather the following information:
Organization's UUID
Organization's RADIUS token
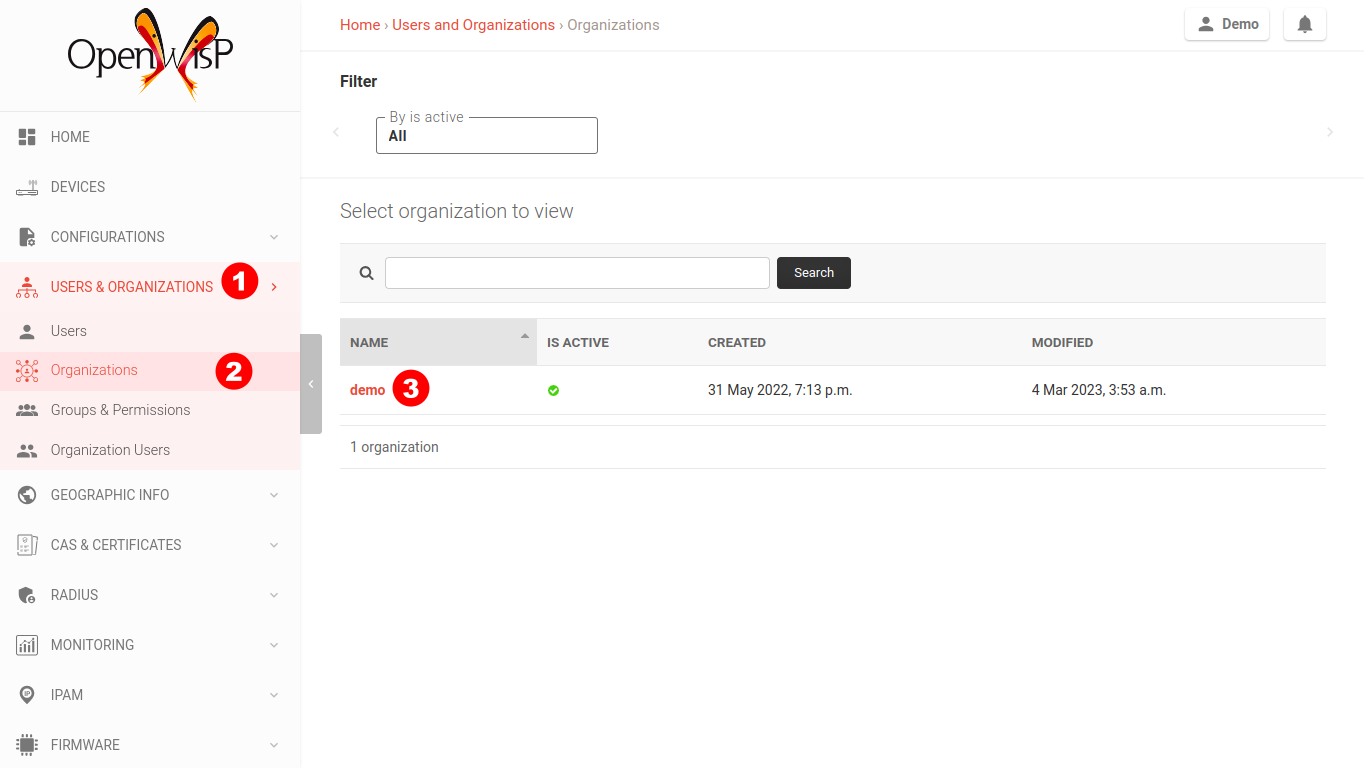
From the OpenWISP navigation menu, go to Users & Organizations and
then Organizations. From here, click on the desired organization.
From the organization's page, find the organization's UUID and RADIUS token.

This is a good point to decide whether to use self-signed certificates or public certificates issued by a trusted Certificate Authority (CA). Both options have their pros and cons, and the choice largely depends on your specific requirements and constraints.
Self-Signed Certificates
Pros:
Generated locally without involving a third-party CA.
Eliminates the need for external entities, reducing the risk of compromised trust.
Cons:
Requires installation of the self-signed CA on all client devices.
Public Certificates
Pros:
Issued by trusted CAs, thus works out of the box with most devices.
Cons:
Higher risk of compromise.
More cumbersome to set up.
We recommend using the Ansible OpenWISP2 role, which simplifies configuring FreeRADIUS to use WPA Enterprise. Please refer to the "Configuring FreeRADIUS for WPA Enterprise (EAP-TTLS-PAP)" section in the ansible-openwisp2 documentation for details.
If you prefer to configure the FreeRADIUS site manually, refer to the "Freeradius Setup for WPA Enterprise (EAP-TTLS-PAP) authentication" section of the OpenWISP RADIUS documentation.
Creating the Template
Note
This template is also available in our Demo System as WPA Enterprise (EAP-TTLS), feel free to try it out!
Hint
If you don't know what a template is, please see Configuration Templates.
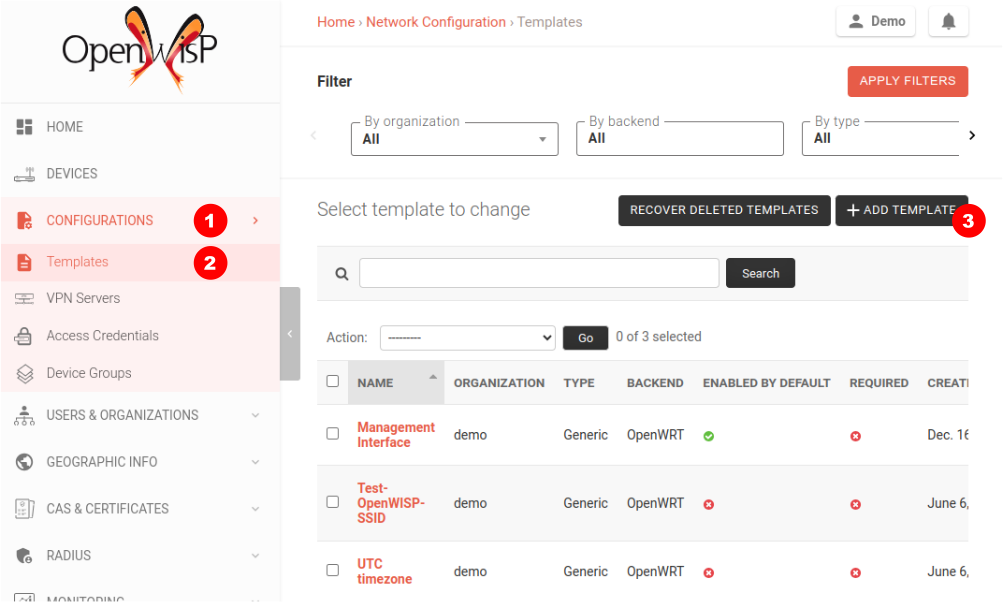
From the OpenWISP navigation menu, go to Configurations and then
Templates, from here click on Add template.
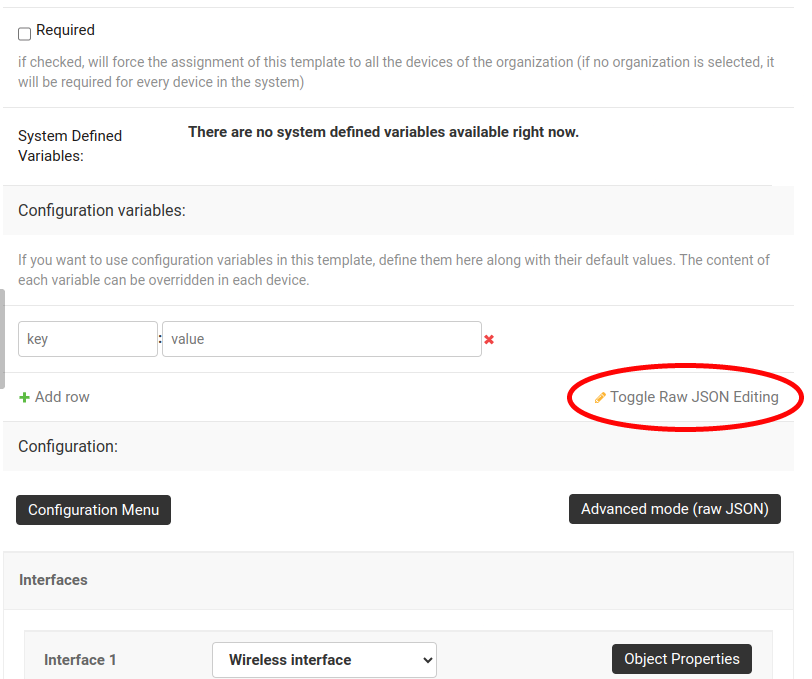
Fill in the name, organization, leave type set to "Generic", and backend
set to "OpenWrt". Scroll down to the Configuration variables section,
then click on "Toggle Raw JSON Editing".
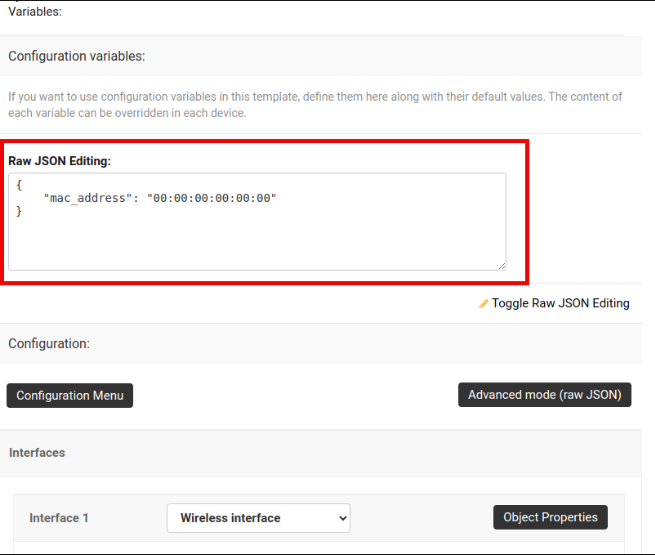
Paste the following JSON in the Raw JSON Editing field.
{
    "mac_address": "00:00:00:00:00:00"
}
Hint
For more information about variables, please refer to Configuration Variables.
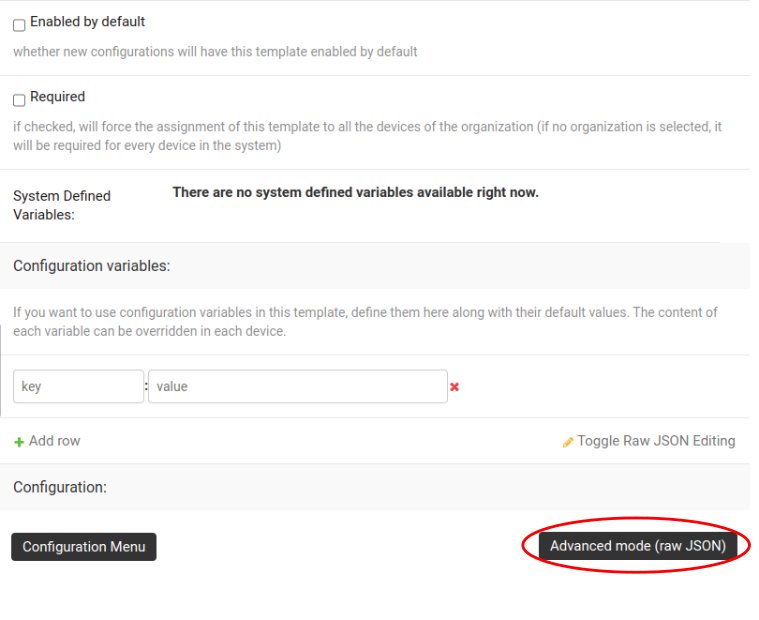
Scroll down to the Configuration section, then click on "Advanced mode
(raw JSON)".
Before copying the following NetJSON to the advanced mode editor, you will need to update these fields to reflect your configuration:
key- RADIUS secret should be the same as set in NASserver- RADIUS server authentication IPport- RADIUS server authentication portacct_server- RADIUS accounting server IPacct_server_port- RADIUS accounting server port
{
    "interfaces": [{
        "name": "wlan_eap",
        "type": "wireless",
        "mac": "{{mac_address}}",
        "mtu": 1500,
        "disabled": false,
        "network": "",
        "autostart": true,
        "addresses": [],
        "wireless": {
            "network": [
                "lan"
            ],
            "mode": "access_point",
            "radio": "radio0",
            "ssid": "WPA Enterprise 2 (EAP-PAP-TTLS)",
            "ack_distance": 0,
            "rts_threshold": 0,
            "frag_threshold": 0,
            "hidden": false,
            "wds": false,
            "wmm": true,
            "isolate": false,
            "ieee80211r": false,
            "reassociation_deadline": 1000,
            "ft_psk_generate_local": false,
            "ft_over_ds": true,
            "rsn_preauth": false,
            "macfilter": "disable",
            "maclist": [],
            "encryption": {
                "protocol": "wpa2_enterprise",
                "key": "testing123",
                "disabled": false,
                "cipher": "auto",
                "ieee80211w": "0",
                "server": "10.8.0.1",
                "port": 1822,
                "acct_server": "10.8.0.1",
                "acct_server_port": 1823
            }
        }
    }],
    "files": [{
        "path": "/etc/openwisp/pre-reload-hook",
        "mode": "0700",
        "contents": "#!/bin/sh\n\n# Ensure radio0 is enabled \nuci set wireless.radio0.disabled='0'\nuci commit wireless"
    }]
}
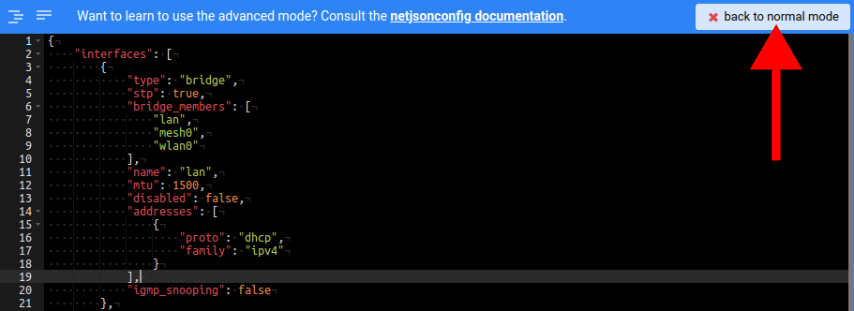
Then click on "back to normal mode" to close the advanced mode editor.
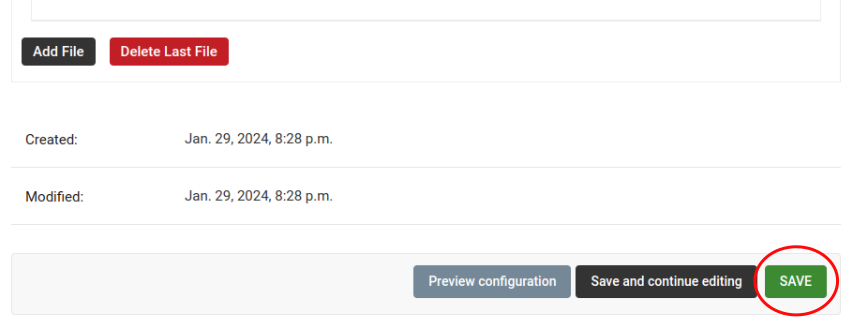
Now you can save the new template.
At this point, you're ready to assign the template to your devices. However, before doing so, you may want to read on to understand the different components of this template:
The
wlan_eapcreates the wireless interface that supports WPA2 Enterprise encryption bound toradio0. This interface is attached to thelaninterface, which is configured to provide internet access in the default OpenWrt configuration.A
pre-reload-hookscript is executed before OpenWrt reloads its services to ensure thatradio0is enabled.The
mac_addressconfiguration variable is added to the template as a placeholder. When the template is applied to a device, the device's actual MAC address will automatically override the placeholder, ensuring that the wireless interface is created with the correct MAC address. This is necessary for tracing which device is being used in RADIUS accounting stats.
Enable the WPA Enterprise Template on the Devices
Now it is time to apply this template to the devices where you want to enable WPA Enterprise authentication on WiFi.
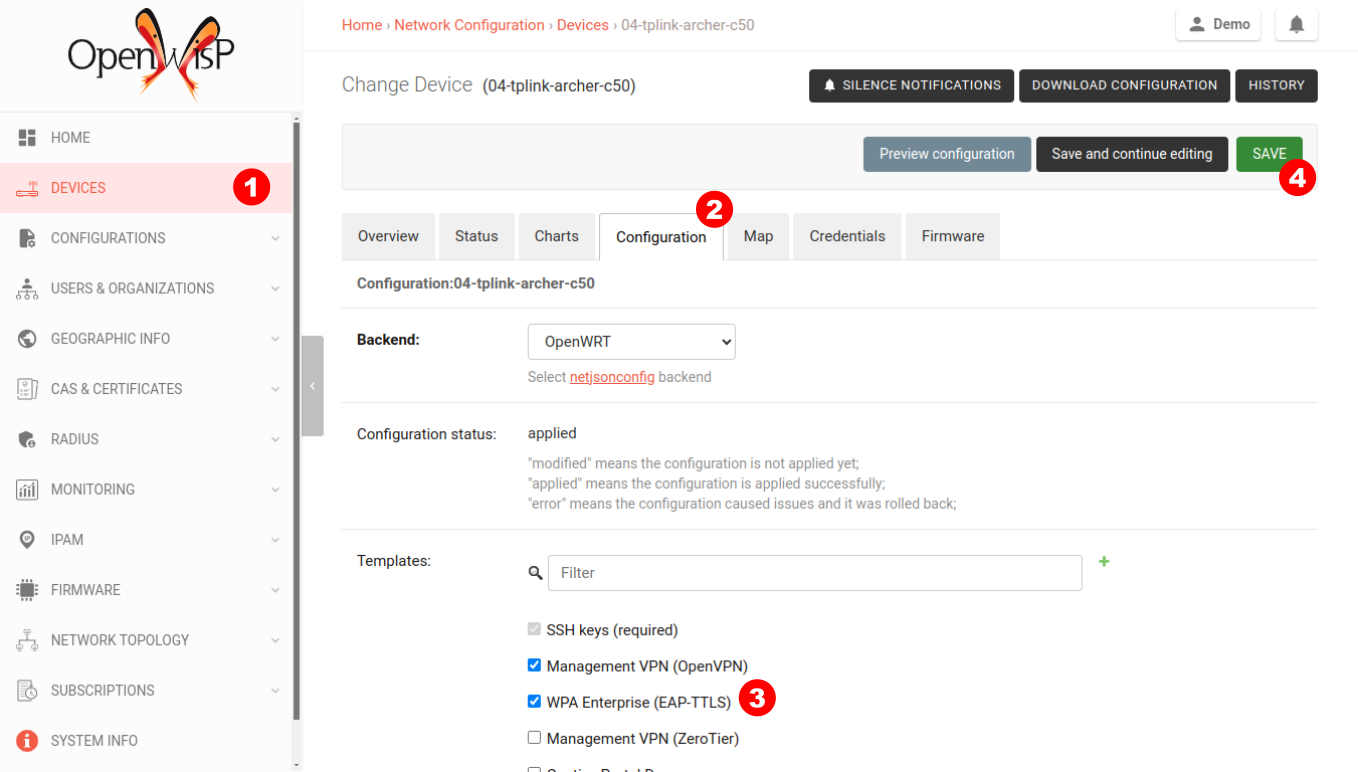
Click on Devices in the navigation menu, click on the device you want
to assign the WPA Enterprise template to, then go to the Configuration
tab, select the template just created, and then click on save.
Connecting to the WiFi with WPA2 Enterprise
For brevity, this section only includes an example of connecting a smartphone running Android 11 to the WiFi network. Similar steps can typically be followed on other devices. If unsure, consult your device's manual for guidance.
Find the "OpenWISP" SSID in the list of available WiFi networks on your mobile and click on it. Fill in the details as follows:
EAP method: Set this to
TTLS.Phase 2 authentication: Set this to
PAP.- CA certificate: Select one of the options based on your
FreeRADIUS configuration.
Domain: Enter the domain based on the server certificate used by FreeRADIUS.
Identity and Password: Use the OpenWISP user's username for
Identityand password forPassword.
Note
If you are trying this feature on our OpenWISP Demo System, you can use the demo user to authenticate. You will need to update the following fields as mentioned:
CA certificate: Set this to
Use system certificatesDomain: Set this to
demo.openwisp.ioIdentity and Password: Use the demo user credentials.
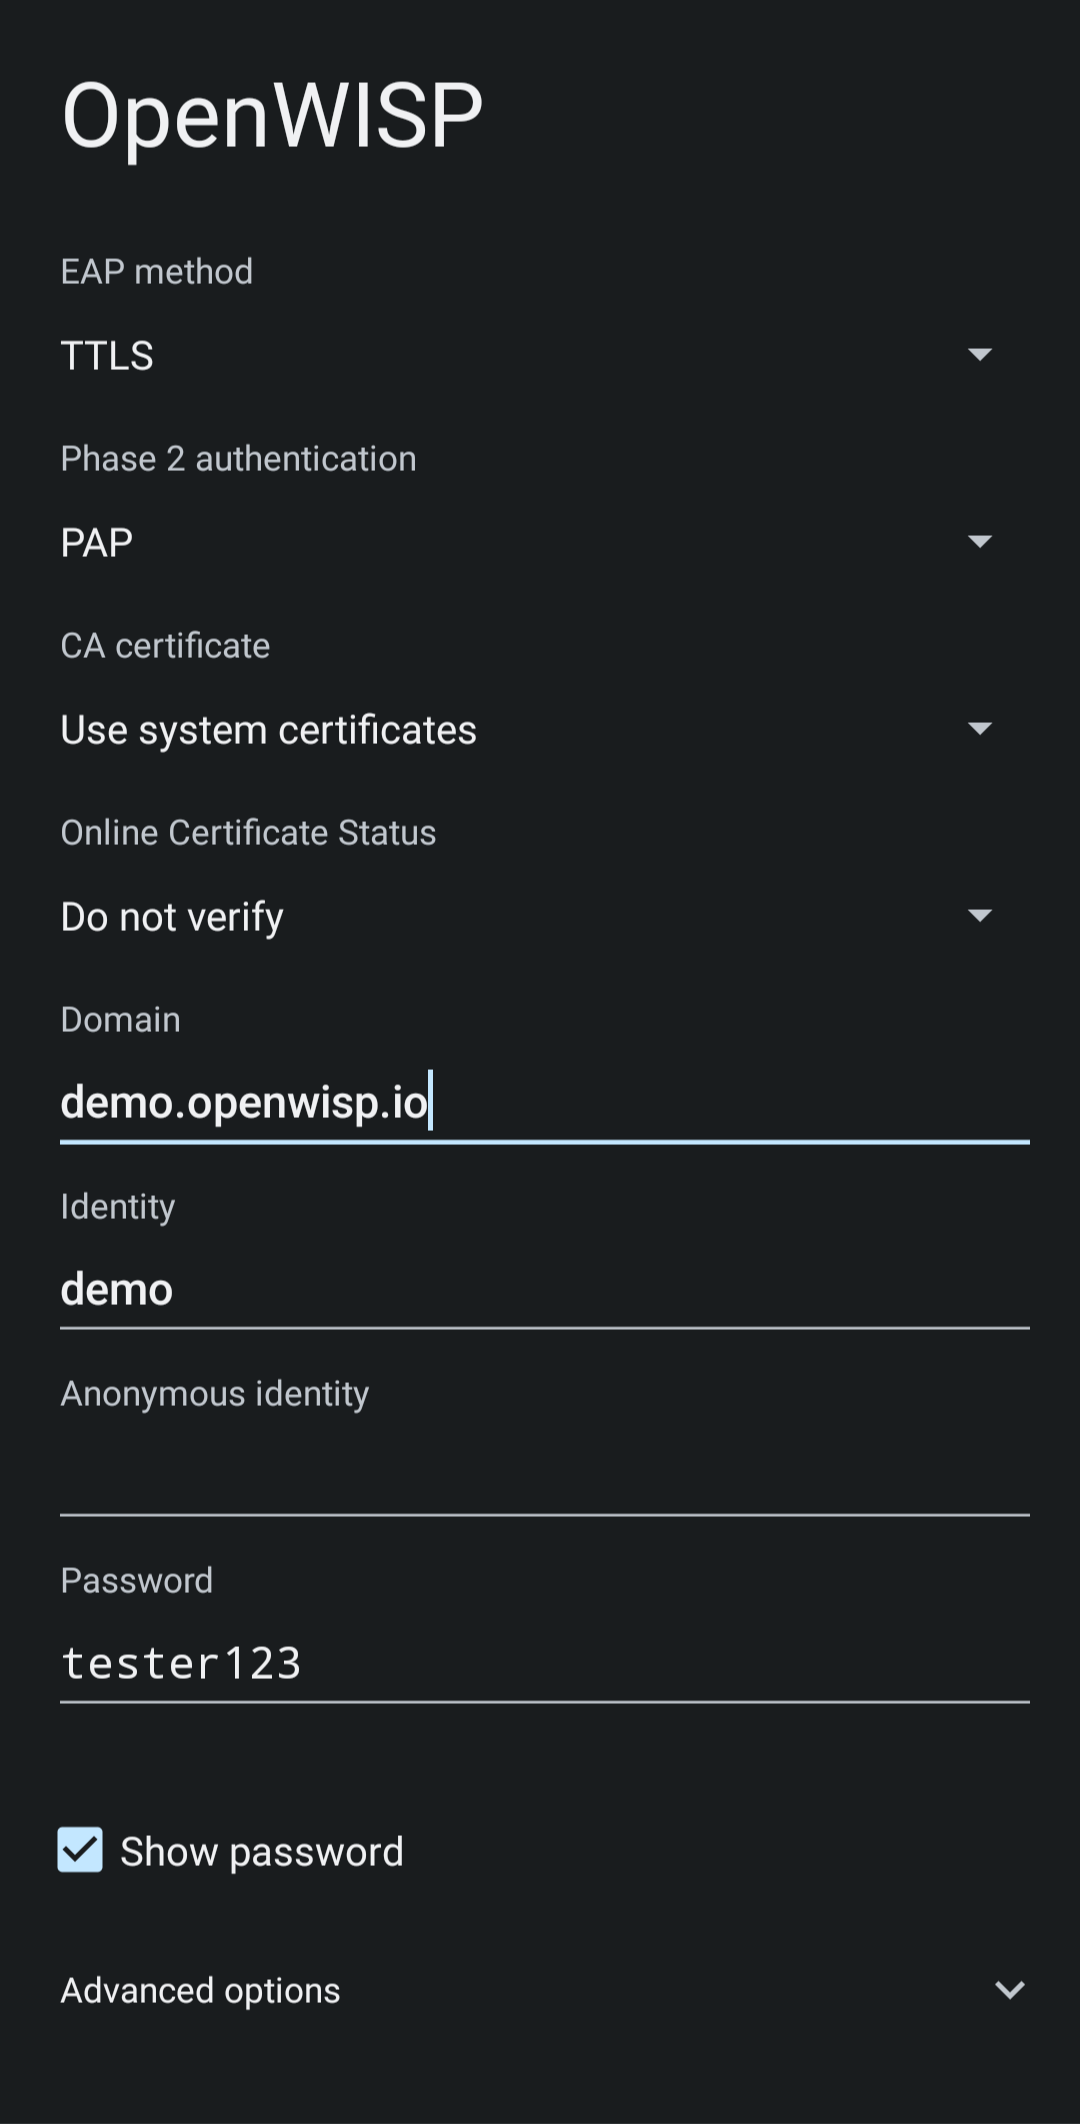
You can leave the Advanced options unchanged and click on Connect after filling in the details.
Verifying and Debugging
If everything worked as expected, your device should connect to the WiFi and allow you to browse the internet.
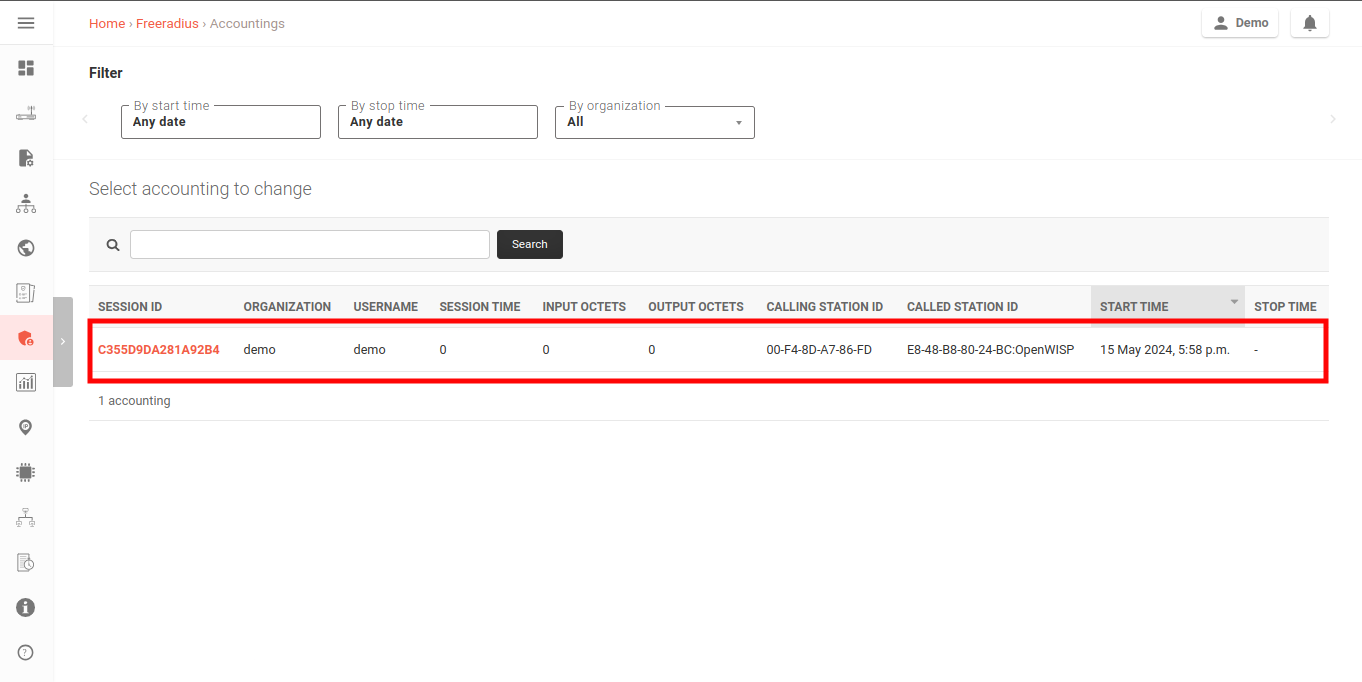
You can also verify the RADIUS session created on OpenWISP. From the
OpenWISP navigation menu, go to RADIUS and then Accounting
Sessions.
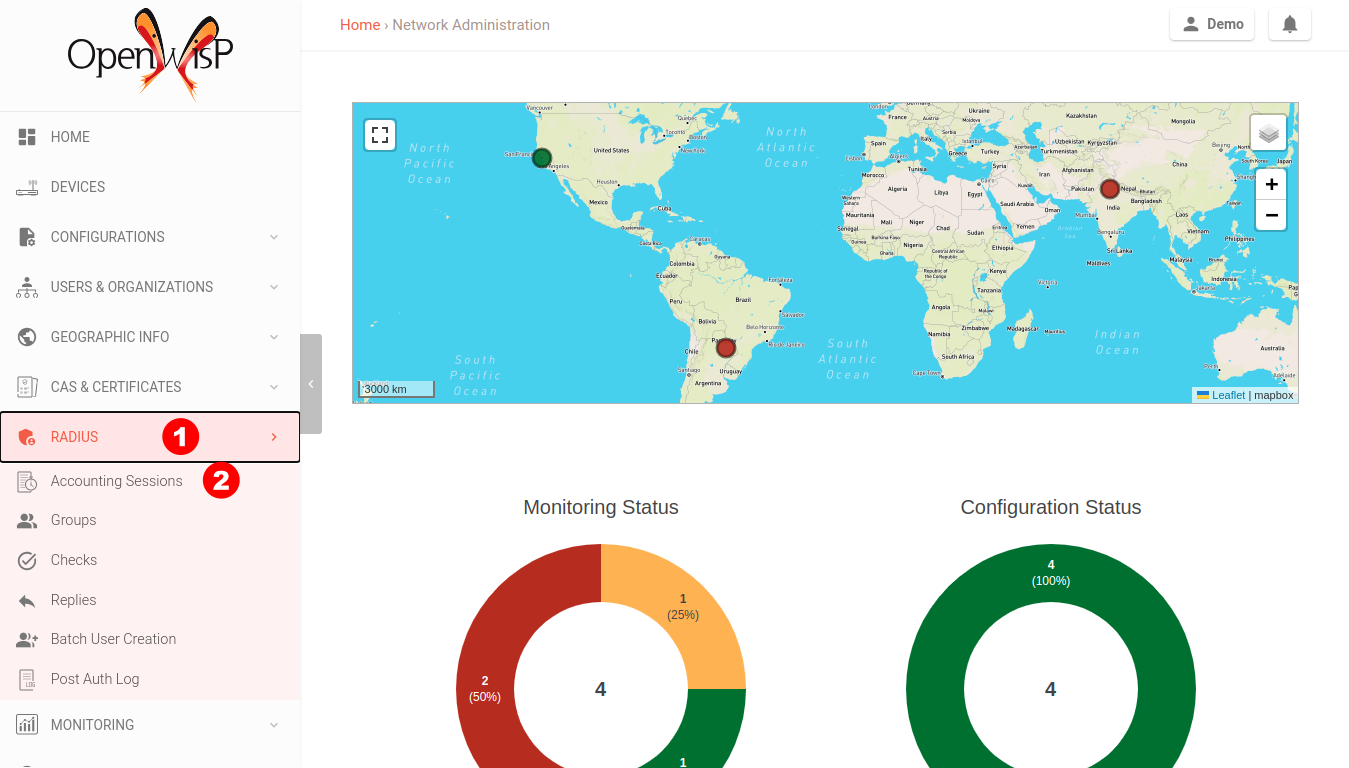
You should see a RADIUS accounting session for this device.
If your smartphone does not connect to the internet, you can troubleshoot the FreeRADIUS configuration by following the steps in the Debugging & Troubleshooting.